
Introduction to Pumpkin Crisp
Why Pumpkin Crisp is the Ultimate Comfort Dessert
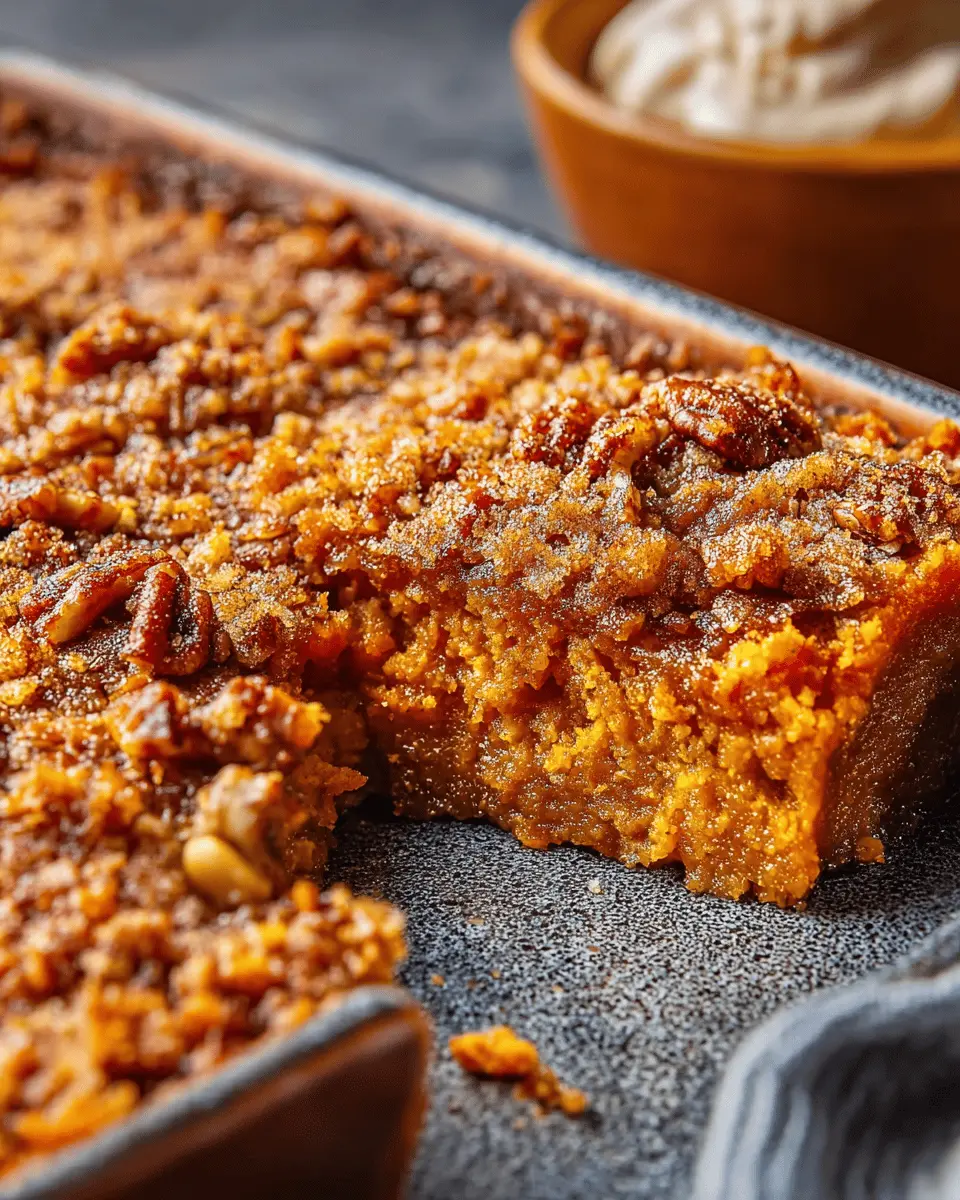
When the leaves start to change and the chill fills the air, nothing quite spells comfort like a warm dessert—enter pumpkin crisp. This delightful treat combines the rich flavors of spiced pumpkin with a delightful crisp topping, creating the perfect balance of creamy and crunchy. The irresistible aroma wafting through your home as it bakes will have everyone gathering in the kitchen, eager for a taste.
What makes pumpkin crisp stand out is its simplicity. With shortcut ingredients like canned pumpkin puree and a butter-flavored cake mix, it comes together in just 15 minutes of prep time. It’s a great way to impress guests with minimal fuss—perfect for busy young professionals looking for a delicious dessert without hours of kitchen labor.
Plus, it’s incredibly versatile! You can swap in your favorite nuts or even go nut-free for a safe option. Serving it warm with a dollop of whipped cream elevates this dessert to a whole new level. For those curious about the health benefits of pumpkin, check out Healthline’s guide on the nutritional perks of this vibrant vegetable.
So, why not whip up a batch and experience the cozy warmth of pumpkin crisp this season?
Ingredients for Pumpkin Crisp
Getting ready to whip up this comforting pumpkin crisp? You’re in for a treat! Here’s a quick rundown of what you’ll need to create this delightful dessert that’s perfect for any fall gathering or cozy night in.
- 1 (15-oz.) can pumpkin puree: This is the star of the dish, lending that rich and creamy texture.
- 1 cup evaporated milk: Adds creaminess and contributes to the filling’s overall structure.
- 1 cup granulated sugar: For that necessary sweetness to balance the savory notes of pumpkin.
- 1 tsp. vanilla extract: A secret weapon to enhance all those delicious flavors.
- ½ tsp. ground cinnamon: This warming spice elevates the pumpkin crisp experience to a whole new level.
- 1 (15.25-oz.) package butter-flavored yellow cake mix: This shortcut ingredient simplifies the process while adding texture.
- 1 cup chopped pecans: For a nutty crunch—feel free to swap this out for other nuts or seeds if you prefer.
- 1 cup butter, melted: Essential for achieving that crumbly topping.
- Whipped cream (optional): No dessert is complete without a dollop of luscious cream on top.
- Ground nutmeg (optional): A sprinkle of nutmeg adds an aromatic finish to your pumpkin crisp.
Once you gather these ingredients, you'll be on your way to baking something magical! If you're curious about alternatives or substitutions, check out this guide for some fantastic ideas. Happy baking!
Preparing Pumpkin Crisp
Making a delicious pumpkin crisp is easier than you think! Let’s break it down step-by-step so you can create this delightful dessert with confidence and ease.
Gather Your Ingredients
Before diving into the fun, it’s essential to gather all your ingredients. You’ll need:
- 1 (15-oz.) can pumpkin puree
- 1 cup evaporated milk
- 1 cup granulated sugar
- 1 tsp. vanilla extract
- ½ tsp. ground cinnamon
- 1 (15.25-oz.) package butter-flavored yellow cake mix
- 1 cup chopped pecans
- 1 cup butter, melted
- Whipped cream (optional)
- Ground nutmeg (optional)
You can often find many of these ingredients at your local grocery store, making them easy to grab on your next shopping trip.
Mix the Pumpkin Base
Now that you’re all set, it’s time to mix the pumpkin base. In a large mixing bowl, combine the pumpkin puree, evaporated milk, sugar, vanilla extract, and cinnamon. This fragrant mixture will serve as the heart of your crisp. Using a whisk or a wooden spoon, stir everything together until smooth and blended. Then, pour this delightful mixture into a lightly greased 13- x 9-inch baking dish.
Layer in the Cake Mix
With the pumpkin mixture now in place, it’s time to build the layers of your pumpkin crisp. Open up the package of butter-flavored cake mix and, evenly sprinkle it over the pumpkin layer. You want to cover the pumpkin mixture completely, creating a delightful sweet base. The cake mix helps deliver a lovely, crumbly top.
Add the Pecans and Butter
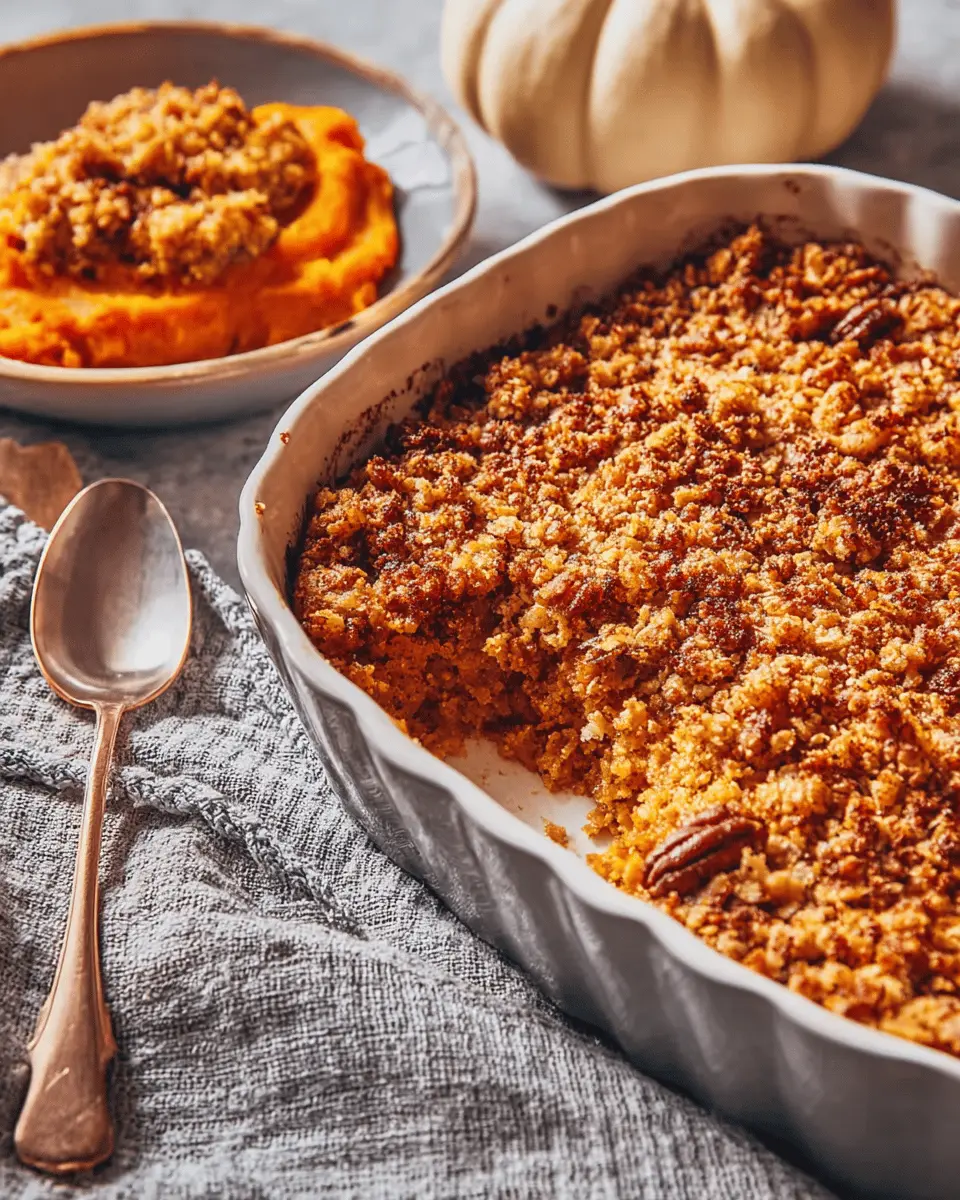
The next step is to add a delicious crunch by incorporating the pecans. Sprinkle the chopped pecans generously over the cake mix layer. After that, drizzle the melted butter evenly over everything. This helps to create that golden brown, crispy topping you’re aiming for.
Bake Until Golden Brown
Finally, it’s time to bake your pumpkin crisp! Preheat your oven to 350°F, then pop the baking dish into the oven. Bake for about 1 hour to 1 hour and 5 minutes, or until the top turns a beautiful golden brown. Once it’s done baking, allow it to stand for 10 minutes before serving. This resting period helps the flavors meld beautifully.
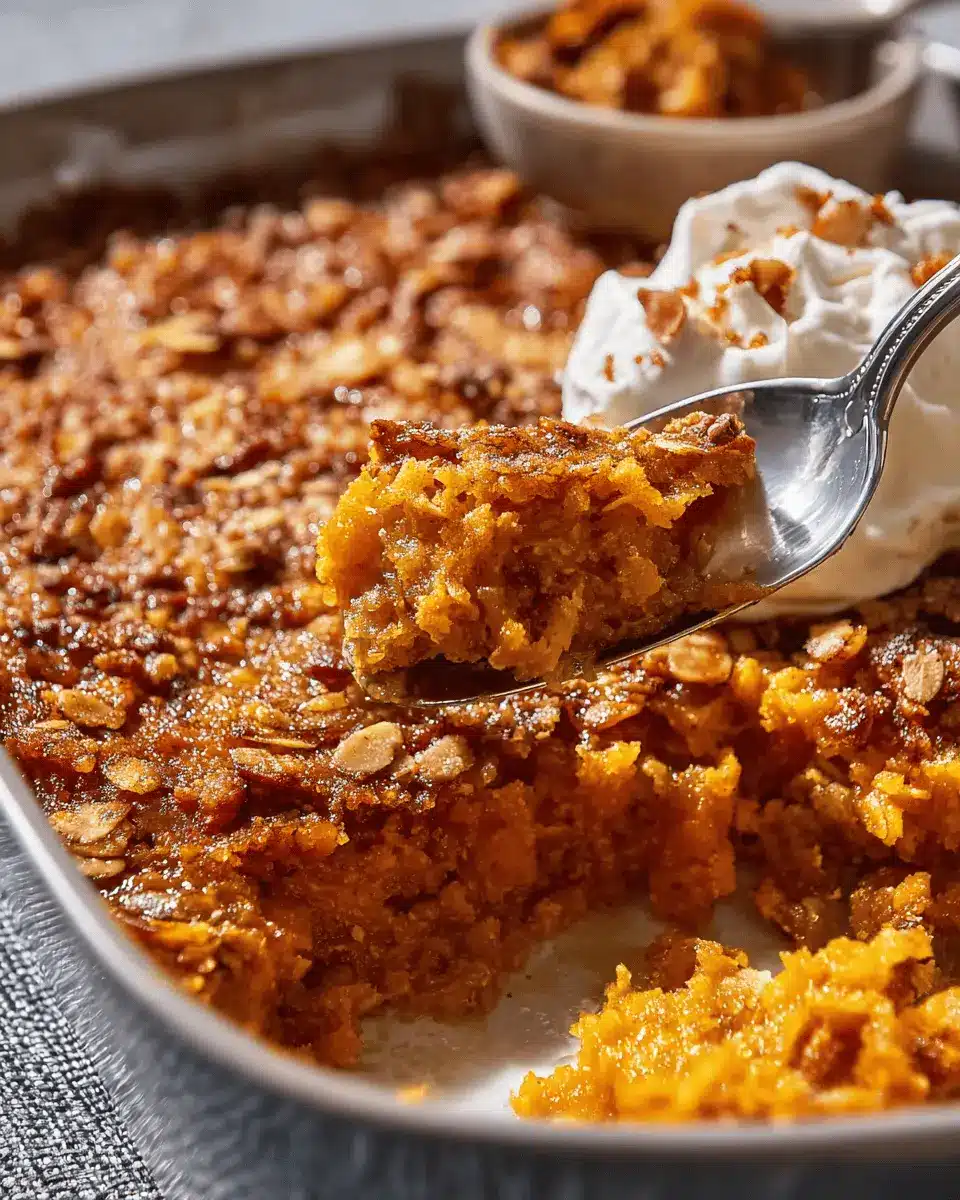
Pro tip: Serve it warm or at room temperature, topped with a dollop of whipped cream and a sprinkle of nutmeg for an extra touch of autumn!
With these straightforward steps, your pumpkin crisp will be a hit at any gathering. Enjoy your baking adventure!
Variations on Pumpkin Crisp
Vegan Pumpkin Crisp
Craving a delicious pumpkin crisp but prefer a plant-based option? You can easily swap out the evaporated milk with coconut milk or almond milk. For a buttery flavor, consider using vegan margarine in place of traditional butter. With rich pumpkin puree and warming spices, this version will impress both vegans and non-vegans alike. Check out this vegan butter substitute guide for more options.
Gluten-Free Pumpkin Crisp
For those following a gluten-free lifestyle, adapting your pumpkin crisp is a breeze! Simply replace the butter-flavored yellow cake mix with a gluten-free cake mix, ensuring a stellar dessert that everyone can enjoy. It's a comforting, fall-inspired treat that doesn’t compromise on taste or texture. Don't forget to check for gluten-free pecans and other toppings for that perfect crunch!
Baking Notes for Pumpkin Crisp
Baking the perfect pumpkin crisp is straightforward, but a few tips can elevate your dish. First, ensure your oven is fully preheated to 350°F for even cooking. Remember to use pure pumpkin puree—not pumpkin pie filling! The texture and flavors will be off if you mix those up. If you prefer a nut-free version, simply omit the pecans or substitute them with pumpkin seeds for a fun crunch.
While you wait for your crisp to cool, whip up some homemade whipped cream to enhance that warm, spicy goodness. Trust me; it’s worth it! Don’t forget to serve it warm—you’ll love the way the flavors meld together.
Serving Suggestions for Pumpkin Crisp
When it comes to enjoying your pumpkin crisp, the way you serve it can elevate the experience. Here are some delightful ways to present this warm dessert:
-
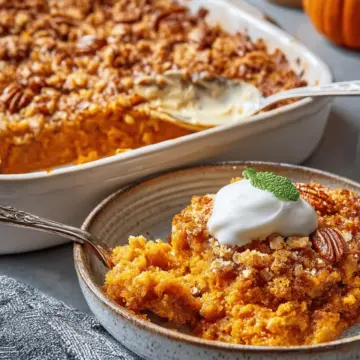
Top with Whipped Cream: A dollop of homemade whipped cream adds a light, airy touch that complements the rich pumpkin flavors beautifully.
-
Sprinkle with Nuts: Add extra crunch by garnishing with roasted pecans or walnuts right before serving. Not only does this enhance the textural experience, but it also boosts the nutty flavor profile.
-
Serve with Ice Cream: For a classic twist, a scoop of vanilla ice cream can create a delicious contrast between hot and cold.
-
Add a Spice Kick: Dust with ground nutmeg or cinnamon for a fragrant finish that ties everything together.
Enjoy your pumpkin crisp warm, and don’t forget to share it with loved ones!
Tips for Making Perfect Pumpkin Crisp
Creating a delightful pumpkin crisp is all about balancing flavors and textures. Here are some easy tips to ensure a delicious outcome:
- Choose Quality Ingredients: Use high-quality pumpkin puree for that rich, fresh taste. Avoid pumpkin pie filling, which contains added spices and sugars.
- Layer Wisely: When layering the cake mix and pecans, make sure to spread them evenly for consistent browning—no one wants a soggy part.
- Check for Doneness: Bake until golden brown, but remember that every oven is different! Keep an eye on the crisp to avoid overbaking.
- Serve Warm: The flavors are at their best when served warm, especially with a dollop of whipped cream.
These simple tips will have you enjoying the perfect pumpkin crisp every time!
Time details for Pumpkin Crisp
Preparation time
Get started with just 15 minutes of prep! This includes gathering your ingredients and combining them into a delicious mixture. It’s quick and easy, perfect for busy weekdays or spontaneous gatherings.
Baking time
Your pumpkin crisp will need about 1 hour to 1 hour and 5 minutes in the oven. This is when the magic happens—watch your creation transform into a golden-brown delight that fills your kitchen with warm, inviting aromas.
Total time
In just 1 hour and 30 minutes, you’ll have a scrumptious dessert ready to impress. Don’t forget to let it stand for 10 minutes after baking to achieve the perfect texture. It’s an ideal treat for gatherings, celebrations, or cozy nights in!
For a deeper dive into pumpkin recipes, check out this article with various ideas you might love.
Nutritional Information for Pumpkin Crisp
When diving into the deliciousness of this Pumpkin Crisp, it's good to know what you're indulging in. Here’s a quick look at the nutritional breakdown per serving to help you enjoy every bite more mindfully.
Calories
Each serving contains approximately 350 calories. This makes it a great option for a sweet treat without overdoing it on calories.
Protein
You'll get about 4 grams of protein per serving, mostly from the pumpkin puree and pecans. While this isn't a protein powerhouse, it adds to the overall delightful balance.
Sodium
The sodium content in each serving is relatively low at around 180 milligrams. This means you can enjoy your Pumpkin Crisp without the worry of excessive sodium intake.
Feel free to check out more on nutritional values at Nutritional Information or explore healthier dessert options that satisfy your sweet cravings!
FAQs about Pumpkin Crisp
Is pumpkin crisp healthy?
When considering pumpkin crisp, it's important to weigh the ingredients. Pumpkin itself is a nutritional powerhouse, rich in vitamins A and C, fiber, and antioxidants. However, the addition of sugar, butter, and cake mix can tip the balance toward indulgence. If you’re looking for a healthier version, consider reducing the sugar or using whole-grain cake mix. You can also add more spices like cinnamon for flavor without calories. For tips on balancing indulgence and health, check out this guide on healthy baking alternatives.
Can I use fresh pumpkin instead of canned?
Absolutely! Using fresh pumpkin can add a delightful depth to your pumpkin crisp. To prepare, simply roast, scoop out, and puree the flesh. This homemade addition can enhance the flavor profile of your dish. Just make sure to measure out the same amount as you would with canned pumpkin, ensuring the texture and moisture remain consistent.
How do I store leftover pumpkin crisp?
If you have tasty leftovers (a rarity!), store your pumpkin crisp in an airtight container in the refrigerator. It can last for about 3 to 4 days. For longer storage, consider freezing it. Just be sure to wrap it well with plastic wrap and then place it in a freezer-safe container. When you're ready to enjoy it again, simply thaw in the fridge overnight and reheat in the oven. For more detailed storage tips, check out this resource on food preservation methods.
Conclusion on Pumpkin Crisp
In summary, Pumpkin Crisp is a delightful dessert that combines warmth and sweetness, perfect for gatherings or a cozy night in. With its simple preparation and comforting flavors, this dish is a must-try. Pair it with whipped cream for an extra touch! Enjoy every bite!
Pumpkin Crisp
Equipment
- baking dish
Ingredients
- 1 15-oz. can pumpkin puree
- 1 cup evaporated milk
- 1 cup granulated sugar
- 1 tsp. vanilla extract
- ½ tsp. ground cinnamon
- 1 15.25-oz. package butter-flavored yellow cake mix
- 1 cup chopped pecans
- 1 cup butter, melted
- Whipped cream optional
- Ground nutmeg optional
Instructions
Combine ingredients
- Stir together first 5 ingredients.
- Pour into a lightly greased 13- x 9-inch baking dish.
- Sprinkle cake mix evenly over pumpkin mixture; sprinkle evenly with pecans. Drizzle butter evenly over pecans.
Bake crisp
- Bake at 350°F for 1 hour to 1 hour and 5 minutes or until golden brown.
- Remove from oven, and let stand 10 minutes before serving.
- Serve warm or at room temperature with whipped cream, if desired. Sprinkle with nutmeg, if desired.
Leave a Reply