
Introduction to Green Velvet Cheesecake Cake
What is a Green Velvet Cheesecake Cake?
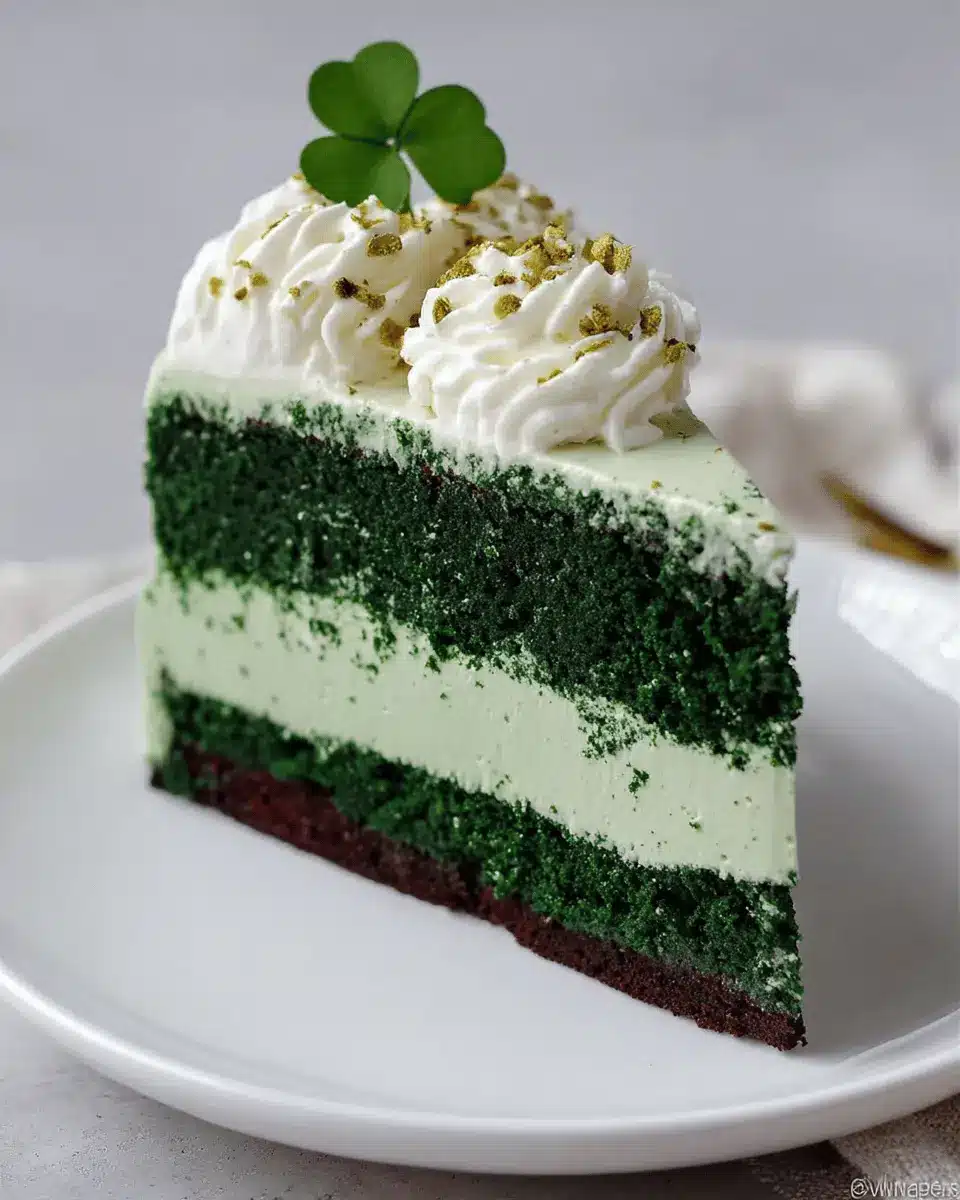
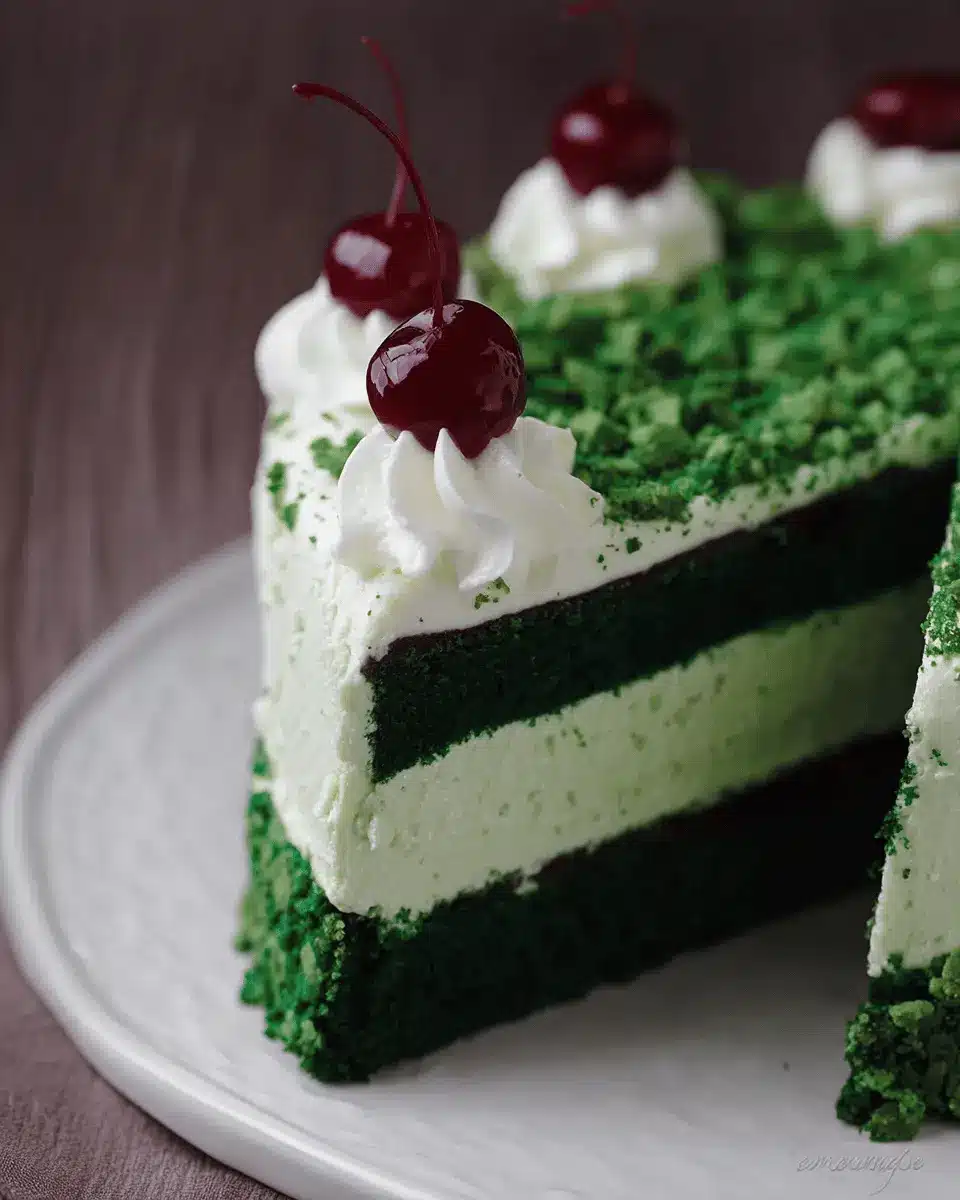
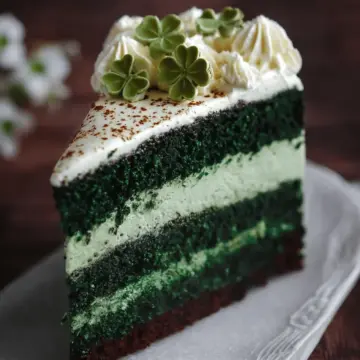
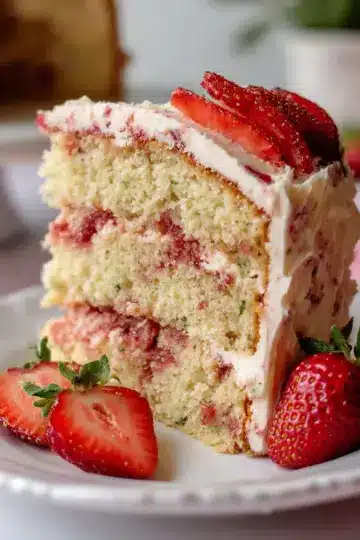
If you’re on the hunt for a show-stopping dessert that will impress guests and elevate your baking game, look no further than the green velvet cheesecake cake. This delightful creation combines the best of both worlds: two layers of moist, vibrant green velvet cake, perfectly cushioned around a rich, creamy layer of cheesecake. It’s not just a feast for the eyes; it’s a delicious union of flavors and textures.
The vivid green color of this cake isn’t just for aesthetics; it also adds a touch of fun, making it a great choice for holiday gatherings, birthdays, or even just a cozy weekend treat. Unlike traditional red velvet, the green hue is achieved with food coloring, making it a twist that brings freshness to the classic recipe.
Have you ever struggled to decide between cheesecake and cake? This recipe solves that dilemma, combining both in a balanced, heavenly slice. Plus, the flavors are easy to customize—feel free to play with the frosting or filling to match your preferences. You can find more about using natural food dyes here to make this dessert a little healthier without sacrificing taste.
Get ready to dive into this delightful adventure of baking!
Ingredients for Green Velvet Cheesecake Cake
Creating a Green Velvet Cheesecake Cake is both an art and a science, and having the right ingredients is crucial for achieving that perfect blend of flavors and textures. Here's a breakdown of what you'll need for each delicious layer:
Cheesecake Layer Ingredients
- Two 8-ounce packages of cream cheese, softened to room temperature
- ⅔ cup granulated white sugar
- A pinch of salt
- 2 large eggs
- ⅓ cup sour cream
- ⅓ cup heavy whipping cream
- 1 teaspoon vanilla extract
For an indulgent cheesecake, make sure your cream cheese is adequately softened; this helps in achieving a smooth consistency. If you’re curious about the science behind baking, check out this cheesecake guide for tips.
Green Velvet Cake Ingredients
- 2½ cups all-purpose flour
- ½ teaspoon salt
- 1½ cups canola or vegetable oil
- 1½ cups granulated white sugar
- 2 large eggs
- 1 teaspoon vanilla extract
- 1 teaspoon white vinegar
- 1 teaspoon baking soda
- 1 cup buttermilk
- 1 tablespoon (½ of a 1-ounce bottle) green food coloring or gel paste
The combination of ingredients gives the green velvet cake its signature moistness and vibrant color, so don’t skip the food coloring!
Frosting Ingredients
- Two 8-ounce packages of cream cheese, softened
- ½ cup (1 stick) salted butter, softened
- One 7-ounce jar of marshmallow creme
- 1 cup powdered sugar
For the frosting, using both cream cheese and marshmallow creme creates a delightful flavor that complements the cake layers perfectly. If you enjoy unique frosting recipes, consider exploring variations on classic cream cheese frosting here.
Now that you have the ingredients ready, you’re all set to dive into the baking process! The delightful combination of the rich cheesecake, moist cake layers, and creamy frosting will certainly impress any crowd at your gathering. Happy baking!
Preparing the Green Velvet Cheesecake Cake
Baking can be an adventure, especially when it comes to creating something as delightful as a green velvet cheesecake cake. This showstopper is perfect for celebrations or just satisfying your sweet tooth. Let’s break down the steps to make this delicious dessert simpler and more enjoyable!
Prepare the Cheesecake Layer
Start by preheating your oven to 325°F. To ensure the cheesecake comes out perfectly creamy, you’ll want to use a water bath. Place a large roasting pan on the lower rack and fill it with boiling water once the cheesecake is ready to bake.
Next, prepare your 9-inch springform pan: spray it with nonstick spray, line the bottom with parchment paper, and wrap the outside with foil to keep any water from seeping in. Mix the cream cheese, sugar, and salt until smooth, then blend in the eggs, sour cream, whipping cream, and vanilla. Pour this luscious batter into your prepared pan and set it in the roasting pan. Bake for about 45 minutes or until it’s set to the touch, then let it cool for at least an hour before freezing for several hours.
Prepare the Cake Layers
After the cheesecake is frozen solid, it’s time for the green velvet cake layers. Preheat your oven again, this time to 350°F. Prepare two 9-inch round cake pans similar to how you prepared the springform pan. In a medium bowl, sift together the flour and salt. In a separate bowl, mix oil and sugar until creamy, followed by the eggs and vanilla.
Dissolve the baking soda in vinegar, add it along with the buttermilk and food coloring, and mix. Combine the wet and dry ingredients, and pour the batter into the prepared pans. Bake them for about 30-35 minutes until a toothpick comes out clean. Let them cool on a wire rack.
Prepare the Frosting
Now, let’s bring everything together with a delightful frosting! Combine the cream cheese and butter in a large bowl, mixing until creamy. Add in the marshmallow creme, followed by the powdered sugar until smooth and perfectly spreadable.
Assemble the Cake
Time to assemble your green velvet cheesecake cake! Place one layer of cake on a serving plate. Carefully remove the cheesecake from the freezer, peel off the parchment, and trim it if necessary to fit the cake layers. Place it atop the first cake layer, then add the second layer on top.
Frost the Cake
Finally, apply a crumb coat to your assembled cake. This thin layer of frosting will lock in the crumbs and help create an even finish. After refrigerating for about 30 minutes to set, spread a thicker layer of frosting on top and down the sides. Feel free to decorate as you wish!
With each component crafted lovingly, your green velvet cheesecake cake is sure to impress and satisfy. Don’t forget to slice and enjoy! For more baking tips, check out resources like King Arthur Baking for inspiring ideas and techniques.
Variations on Green Velvet Cheesecake Cake
Red Velvet Version
If you're a fan of red velvet, you’re in for a treat! Simply swap out the green food coloring for red, and you can creatively transform your green velvet cheesecake cake into a classic red velvet delight. This variation still retains the luscious cheesecake layer, offering a gorgeous contrast between the vibrant red and creamy white. It’s perfect for anyone who loves a pop of color on their dessert table!
Different Flavor Frostings
While the suggested frosting for your green velvet cheesecake cake is a sweet cream cheese blend, why not mix things up? Consider adding flavors such as chocolate, mocha, or even citrus zest for a refreshing twist. For example, a zesty lemon buttercream could beautifully complement the richness of the cheesecake. Explore your palate and pick a frosting that matches your mood or the season!
Cooking tips and notes for Green Velvet Cheesecake Cake
Key baking tips
- Room Temperature Ingredients: Ensure your cream cheese and eggs are at room temperature for the cheesecake layer. This helps achieve that smooth, creamy texture.
- Don’t Skip the Water Bath: Using a water bath for your cheesecake can make all the difference. It prevents cracking and ensures even cooking. For detailed guidance on this technique, check out Serious Eats.
- Be Careful with Color: When measuring your green food coloring, start with less and gradually add more. You can always deepen the color later!
Common mistakes to avoid
- Overmixing the Cake Batter: When mixing your green velvet cake, stop mixing as soon as the dry ingredients are incorporated. Overmixing can result in a dense cake.
- Not Cooling Properly: Allow both cake layers and the cheesecake to cool completely before assembling. If they’re warm, you risk melting your frosting.
- Skipping the Crumb Coat: A crumb coat not only helps keep those pesky crumbs in check, but it also makes your final frosting layer smoother.
By following these tips, your green velvet cheesecake cake will turn out beautifully every time!

Serving suggestions for Green Velvet Cheesecake Cake
Best occasions for serving
The Green Velvet Cheesecake Cake is not just a dessert; it’s an experience perfect for celebrating life’s special moments. Picture it at:
- Birthdays: An eye-catching centerpiece for any birthday bash.
- Holidays: Bring festivity to gatherings, especially during spring or St. Patrick's Day.
- Bridal or Baby Showers: A charming treat that your guests will love to photograph.
Imagine the joy on your friends' faces as they indulge in a slice!
Pairing options
To enhance your Green Velvet Cheesecake Cake experience, consider these delightful pairings:
- Fruits: Fresh berries add a bright contrast to the cake's rich flavors.
- Coffee or Tea: Serving with a warm cup can create a delightful balance to the sweetness, making it an excellent afternoon treat.
- Creamy Ice Cream: A scoop of vanilla or mint chocolate chip will elevate the dessert experience.
This cake is sure to leave a memorable impression regardless of the occasion. Have fun experimenting!
Time breakdown for Green Velvet Cheesecake Cake
Preparation time
This scrumptious green velvet cheesecake cake requires about 1 hour of preparation. During this time, you’ll whip up the cheesecake layer and get the cake batter ready. It’s the perfect opportunity to gather your ingredients and set the mood for some baking fun!
Cook time
After the prep, you’ll spend around 1 hour and 15 minutes cooking. This includes baking both layers of the cake and your cheesecake, allowing you to enjoy the lovely aroma that fills your kitchen while you wait.
Total time
In total, you’ll dedicate about 2 hours and 15 minutes to create this layered masterpiece. However, keep in mind that you'll want to account for 5 hours of freeze time for the cheesecake to set perfectly. It’s well worth the wait for such a delightful dessert!
For tips on freezing and thawing your green velvet cheesecake cake, check out resources like the Food Network. Happy baking!
Nutritional Facts for Green Velvet Cheesecake Cake
When indulging in a slice of Green Velvet Cheesecake Cake, it’s essential to know what you're treating yourself to. Here's a quick snapshot of its nutritional profile:
Calories per Serving
Each serving contains approximately 646 calories. So, while this cake is certainly a delicious splurge, keep this in mind when planning your meal.
Protein Content
This decadent dessert offers about 9 grams of protein per slice. That’s a nice bonus for a cake, providing a bit of sustenance alongside the sweet experience!
Sugar Content
With 51 grams of sugar per serving, this cake packs quite a sugary punch. It’s perfect for those special occasions, but moderation is key if you're watching your sugar intake.
If you're curious about more dessert nutrition breakdowns or alternatives, check out NutritionData for valuable insights and data. Enjoy your baking journey!
FAQs about Green Velvet Cheesecake Cake
Can I make this cake ahead of time?
Absolutely! This Green Velvet Cheesecake Cake is perfect for prepping in advance. You can make both the cheesecake and the cake layers the day before. Just ensure that you store the cheesecake in an airtight container after it’s fully cooled and frozen. When you’re ready to assemble, simply take it out and let it thaw for a bit before stacking.
How do I store leftovers?
Storing leftovers is a breeze! Keep your green velvet cheesecake cake in the fridge for up to 5 days. Just place it in an airtight container or cover it tightly with plastic wrap to maintain its freshness. You can also freeze individual slices for later enjoyment—just wrap them well in plastic wrap and aluminum foil.
Can I use different food coloring?
Definitely! While the recipe calls for green food coloring for that festive flair, feel free to experiment with other colors. Using gel paste food coloring can yield even more vibrant results, making your cake uniquely yours! Whether you want a classic red or a fun pastel shade, the choice is yours. Happy baking!
For more tips on food coloring options, check out Wilton’s Guide to Food Coloring.
Conclusion on Green Velvet Cheesecake Cake
In conclusion, the green velvet cheesecake cake is a delightful dessert that combines the rich flavors of cheesecake with the fun twist of a vibrant velvet cake. It's perfect for celebrations and will impress your guests with its beautiful layers and creamy texture. Enjoy baking this treat, and don't forget to share your experience!
Green Velvet Cheesecake Cake
Equipment
- Oven
- Electric mixer
- 9-inch springform pan
- roasting pan
- Medium bowl
- large bowl
- small bowl
- cake plate
Ingredients
CHEESECAKE
- 16 ounces cream cheese, at room temperature
- ⅔ cup granulated white sugar
- a pinch salt
- 2 large eggs
- ⅓ cup sour cream
- ⅓ cup heavy whipping cream
- 1 teaspoon vanilla extract
GREEN VELVET CAKE
- 2½ cups all purpose flour
- ½ teaspoon salt
- 1½ cups canola or vegetable oil
- 1½ cups granulated white sugar
- 2 large eggs
- 1 teaspoon vanilla extract
- 1 teaspoon white vinegar
- 1 teaspoon baking soda
- 1 cup buttermilk
- 1 tablespoon green food coloring alternately, you can use gel paste
FROSTING
- 16 ounces cream cheese, at room temperature
- ½ cup salted butter, at room temperature
- 7 ounces marshmallow creme
- 1 cup powdered sugar
Instructions
PREPARE THE CHEESECAKE LAYER
- Preheat the oven to 325℉. Place a large roasting pan on the lower third rack of the oven. Place a kettle of water on the stove to boil. Spray a 9-inch springform pan with nonstick spray and line the bottom with a round of parchment paper. Wrap a double layer of heavy duty foil around the bottom and up the sides of the pan (you want to seal it so the water from the water bath doesn’t seep into the pan).
- In a large bowl, use an electric mixer to blend the cream cheese until it is smooth and creamy, 1 to 2 minutes. Mix in the sugar and salt and blend for 2 minutes, scraping down the sides of the bowl to make sure all is mixed in. Add the eggs, one at a time, blending after each addition. Finally, mix in the sour cream, whipping cream and vanilla. Mix until smooth. Pour the batter into the prepared pan. Set the pan into the roasting pan in the pre-heated oven. Carefully pour the hot water from your kettle into the roasting pan. Pour enough water so that there is about an inch of water coming up the foil along the sides of the cheesecake pan.
- Bake the cheesecake for 45 minutes. It should be set to the touch and not jiggly. Remove the cheesecake from the roasting pan and let it cool on a wire rack for at least an hour. When it has cooled, place the pan into the freezer and let the cheesecake freeze completely (4 to 5 hours or overnight).
PREPARE THE CAKE LAYERS
- Preheat the oven to 350℉. Spray two 9-inch round pans with nonstick spray and line each pan with a round of parchment paper. In a medium bowl, sift together the flour and salt.
- In a large bowl, combine the oil and sugar together and beat with an electric mixer for 2 minutes. Add the eggs, one at a time, and the vanilla, and beat for an additional 2 minutes.
- In a small bowl, combine the vinegar and baking soda and stir to dissolve. Add the vinegar to the bowl, along with the buttermilk and food coloring. Beat on medium-low speed for 1 minute, until blended. Add the dry ingredients and increase speed to medium-high, scraping down the sides of the bowl while mixing, for 2 additional minutes. Divide the batter evenly between the prepared pans.
- Bake 30 to 35 minutes, or until a toothpick inserted into the center comes out with a few moist crumbs attached. Let the cakes cool for 20 minutes. Run a knife along the edge of the pans, then invert the cakes onto a rack to cool completely.
PREPARE THE FROSTING
- In a large bowl, using an electric mixer on medium-high speed, combine the cream cheese and butter and beat until creamy and smooth. Add the marshmallow creme and mix until smooth. Add in the powdered sugar and continue to beat, scraping down the sides of the bowl, until all of the ingredients are mixed in and the frosting is smooth and spreadable.
ASSEMBLE THE CAKE
- Place one cake layer into the center of a cake plate or platter. Remove the cheesecake from the freezer, take off the sides of the pan, and slide a knife under the parchment to remove the cheesecake from the pan. Peel off the parchment. Trim the cheesecake, as needed to match the size of your cake layers. Place the cheesecake layer on top of the first cake layer. Place the second cake layer on top of the cheesecake.
FROST THE CAKE
- Apply a crumb coat layer of frosting to the cake, and refrigerate the cake for 30 minutes, or until the frosting is set. Apply the second layer of frosting. Add a large scoop of frosting onto the top of the cake. Use a long, thin spatula or knife to spread the frosting evenly across the top and then spread it down the sides of the cake too. Decorate, as desired.

Leave a Reply