
Introduction to Garlic Bread Rolls
Garlic bread rolls are a delightful twist on the classic garlic bread that will surely elevate your dining experience. Imagine biting into a warm, fluffy roll that's generously filled with a rich buttery garlic and herb concoction. Not only are these rolls incredibly scrumptious, but they also fill the kitchen with an irresistible aroma that will have your friends and family eagerly awaiting the meal.
Why homemade garlic bread rolls are a must-try?
Making garlic bread rolls from scratch may seem daunting, but trust me, it's worth every minute spent! For starters, the freshness of homemade bread is unparalleled; it adds tenderness and flavor that store-bought alternatives just can't match. Plus, when you control the ingredients, you can customize them to your liking—whether you prefer more garlic, extra herbs, or even a touch of cheese.
By choosing to make your garlic bread rolls, you also bring a sense of accomplishment that comes from creating something delicious with your own two hands. It’s a fantastic way to impress guests at dinner parties or simply to treat yourself on a cozy night in. If you’re looking to elevate your bread game, these rolls are a must-try!
For a friendly guide on bread techniques, you can check out King Arthur Baking. It’s a treasure trove of baking wisdom!
Ingredients for Garlic Bread Rolls
Creating the perfect garlic bread rolls starts with selecting the right ingredients. Let’s break it down to ensure you have everything you need for this delicious treat!
Essential Ingredients for the Dough
To achieve a fluffy and flavorful base, you’ll need:
- 600 g strong white bread flour (don’t forget some extra for dusting!)
- 14 g dried active yeast for that lovely rise
- 1 tablespoon caster sugar to nourish the yeast
- 90 g unsalted butter (cold & cubed) to enrich the dough
- 275 ml full-fat milk to add moisture
- 1 medium egg for binding and richness
- ½ teaspoon sea salt to enhance flavor
Ingredients for the Garlic and Herb Filling
This is where the magic happens! For the delectable filling, gather:
- 45 g unsalted butter (melted) to blend all the flavors
- 4+ garlic cloves (finely chopped) because, let’s be honest, garlic is king in this recipe
- 1 teaspoon dried mixed herbs for an aromatic touch
- ½ teaspoon sea salt to balance the flavors
- 15 g fresh parsley (chopped) to bring freshness
- 25 g parmesan (grated) for a savory kick
Topping Ingredients for Flavor
Finish the rolls with a burst of deliciousness using:
- 25 g parmesan to sprinkle on top, creating a cheesy crust
- Fresh parsley (chopped) to garnish and brighten the dish
With these ingredients, you're all set to create irresistible garlic bread rolls! For more tips and details, check out Jane's Patisserie or explore her easy bread-making techniques! Happy baking!
Preparing Garlic Bread Rolls
Making garlic bread rolls from scratch can be an incredibly rewarding experience. Not only do you end up with a delicious, tear-and-share treat, but you also develop a deeper appreciation for homemade bread. Let’s walk through the steps together and get those rolls rising!
Mixing the dry ingredients
Start by sifting 600 g of strong white bread flour into a large mixing bowl. The sifting helps incorporate air, making your rolls light and fluffy. Next, add 14 g of dried active yeast, 1 tablespoon of caster sugar, and ½ teaspoon of sea salt. Mixing these dry ingredients evenly is crucial; it ensures that every bite of your garlic rolls will have great flavor.
Incorporating the butter
Now, it’s time for the butter! Cube 90 g of unsalted butter and rub it into the flour mixture until it resembles breadcrumbs, much like you would when making scones. This butter will provide richness and a delightful flakiness.
Heating and adding milk and egg
In a separate saucepan, gently heat 275 ml of full-fat milk until it’s warm but not boiling. Think of it as a warm hug for your dough! Add to this liquid 1 medium egg and stir to combine. Pour this mixture into your dry mix and watch as the magic begins to unfold.
Kneading the dough to perfection
It’s time to engage those arm muscles! Knead the dough for about 7-10 minutes. Don’t be surprised if it feels sticky at first; as you work it, the dough will become smooth and elastic. If you’re using a stand mixer with a dough hook, this part becomes a breeze.
Allowing the dough to rise
Once kneaded to perfection, place the dough in a lightly oiled bowl. Cover it with cling film and allow it to rise for 1-2 hours or until it doubles in size. A warm spot in your kitchen works wonders here. During this waiting period, your dough is developing flavor and texture—patience is key!
Preparing the filling
While the dough rises, prep your irresistible filling! Finely chop 4+ garlic cloves and mix them with 45 g of melted unsalted butter, adding 1 teaspoon of dried mixed herbs, ½ teaspoon of sea salt, 15 g of fresh parsley, and 25 g of grated parmesan. This filling blends perfectly with the buttery rolls, making each bite absolutely heavenly.
Rolling out the dough and adding the filling
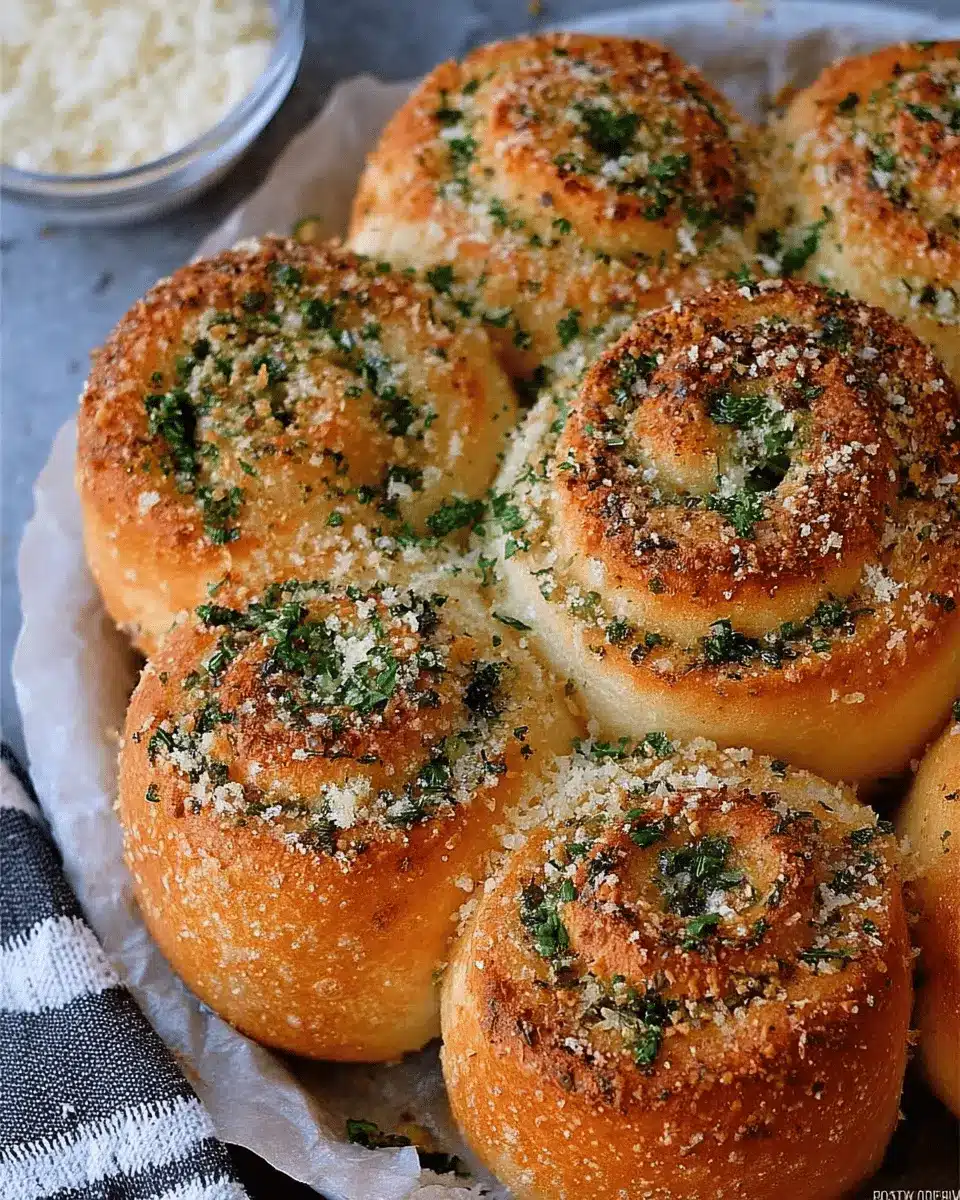
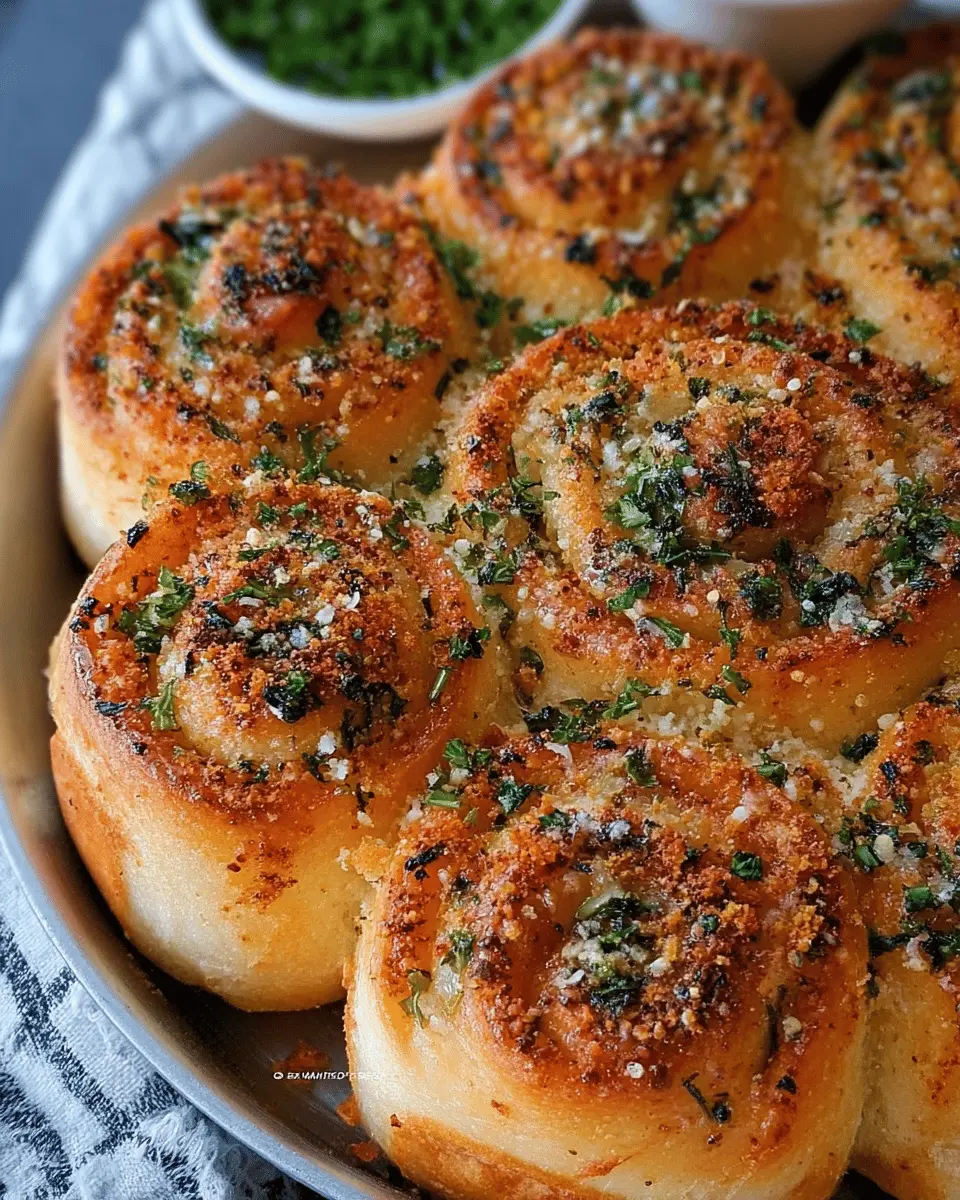
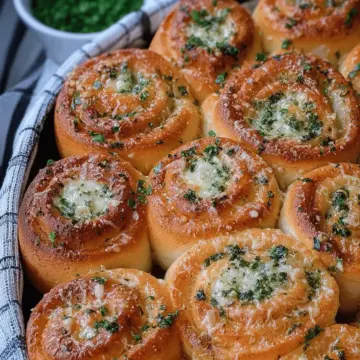
Once the dough has risen, roll it out into a large rectangle on a floured surface—aim for about 50cm x 30cm. Brush your garlic butter mixture over the dough, then sprinkle on the mixed herbs and parmesan. This is the moment the garlic bread rolls start to take shape!
Cutting the rolls and letting them rise again
Roll the dough tightly from one long side to another, forming a “long sausage.” Slice it into 12 equal pieces. Place these in a lightly greased baking dish—ideally 30cm x 24cm—spacing them out. Cover them again with cling film and let them rise for another hour until they are touching.
Baking the rolls and achieving that golden crust
Towards the end of the second rise, preheat your oven to 180°C/160°C Fan. Bake your rolls for 20-25 minutes until they are golden brown and cooked through. When they come out of the oven, resist the urge to dive in immediately; let them cool for a moment, then sprinkle with fresh parsley and extra parmesan for a delightful finish.
By following these steps, you’ll have a batch of fluffy garlic bread rolls that are sure to impress. Perfect for sharing at your next gathering or enjoying with a warm bowl of soup, these rolls will elevate any meal. Happy baking!
Variations on Garlic Bread Rolls
Cheese-Stuffed Garlic Bread Rolls
Elevate your garlic bread rolls game by adding gooey cheese! Simply incorporate 100-200g of grated mozzarella or your favorite cheese into the filling. As the rolls bake, the cheese will melt into a luscious, savory surprise. Imagine tearing into a roll to discover a warm, cheesy center that perfectly complements the garlic butter!
Herb-Infused Garlic Bread Rolls
For a fragrant twist, consider using various fresh herbs in your garlic bread rolls filling. Basil, rosemary, or even chili flakes can bring a unique flavor profile. Mix and match to create a blend that suits your taste; these variations can transform a classic recipe into an aromatic delight.
Experimenting with these ideas can keep your garlic bread rolls fresh and exciting. Enjoy the process and let your creativity shine! For more inspiration, check out Serious Eats or BBC Good Food for herb combinations!
Cooking tips and notes for Garlic Bread Rolls
Best practices for dough rising
To achieve perfectly fluffy garlic bread rolls, it’s essential to provide a warm environment for your dough to rise. Ideally, place it in a dimly lit area, away from drafts. If you’re short on time, try placing it in a turned-off oven with a bowl of hot water underneath to create a cozy atmosphere. Remember, the dough should double in size, so don’t rush the process—this step is crucial for texture!
Storage suggestions for leftover rolls
Leftover garlic bread rolls can be stored for 2-3 days in an airtight container at room temperature. For longer storage, consider freezing them. Wrap each roll in foil and place them in a freezer bag. This way, you can enjoy them later—just pop them in the oven to warm up! Trust us, nothing beats the aroma of freshly baked garlic rolls filling your kitchen again.

Serving Suggestions for Garlic Bread Rolls
Pairing Garlic Bread Rolls with Soups
One of the best ways to enjoy garlic bread rolls is alongside a warm bowl of soup. Their soft, fluffy texture and savory garlic flavor complement various soups beautifully. Try them with:
- Tomato Soup: The classic combo is always a hit.
- Minestrone: Hearty and packed with veggies, it’s a perfect match.
- Chicken Noodle: The comforting flavors will have you reaching for seconds.
These rolls soak up broth and flavors, making your meal delightful!
Ideas for Garlic Rolls at Gatherings
If you’re hosting a gathering, garlic bread rolls can elevate your spread. Consider serving them:
- As an Appetizer: Warm and buttery, they’re great with dips like spinach artichoke or roasted red pepper.
- With Cheese Platters: Pair with creamy cheeses and fresh fruit for a delightful contrast.
- In a Sandwich Station: Offer them alongside various fillings like turkey bacon or chicken ham for a fun DIY meal.
No matter the occasion, these rolls are sure to impress your guests! Looking for more ideas? Check out these serving tips for inspiration.
Time Breakdown for Garlic Bread Rolls
When it comes to making the perfect garlic bread rolls, having a clear idea of the time involved can help you plan your cooking with ease. Here’s how the time stacks up:
Preparation Time
Allow about 35 minutes for preparing the dough, mixing your delicious garlic and herb butter filling, and rolling everything up into beautiful little rolls.
Cooking Time
Once you're ready to bake, pop your rolls in the oven for 25 minutes. This will transform your dough into golden, heavenly bread rolls that will fill your kitchen with an irresistible aroma.
Total Time Needed
In total, you’ll need approximately 4 hours. This includes proofing time to let the dough rise and bring out that fluffy texture, so patience is key! Trust me, the wait will be worth it when you bite into those warm, buttery rolls.
For more tips and insights on baking bread and enhancing flavors, check out articles on The Kitchn or Serious Eats. Enjoy your baking!
Nutritional Facts for Garlic Bread Rolls
Calories Per Roll
If you’re wondering about the guilt factor, each of these delightful garlic bread rolls contains approximately 150 calories. Perfect for indulging without completely sacrificing your meal plan!
Macronutrients Breakdown
These tasty rolls offer a balanced mix of macronutrients to fuel your day:
- Carbohydrates: 30g
- Protein: 4g
- Fat: 5g
This makes garlic bread rolls a satisfying option that pairs well with various meals. For a healthier twist, consider adding a side salad or pairing them with a light soup!
For more information on the nutritional benefits of garlic, check out this insightful article from Healthline.
FAQs about Garlic Bread Rolls
Can I make garlic bread rolls ahead of time?
Absolutely! You can prepare the garlic bread rolls up to the second proving stage and refrigerate them overnight. Just cover them tightly with cling film to keep moisture in. The next day, let them come to room temperature and rise until doubled in size before baking. This way, you'll have freshly baked rolls ready to enjoy anytime!
What can I use instead of strong white flour?
No strong white flour? No problem! You can substitute it with all-purpose flour or bread flour for slightly different textures. Whole wheat flour can also work, but keep in mind that it may alter the flavor and density of your rolls. For a gluten-free option, use a gluten-free flour blend, available at most grocery stores.
How can I adjust the recipe for dietary restrictions?
It's easy to customize garlic bread rolls to fit various dietary needs. Consider substituting the unsalted butter with dairy-free alternatives, like coconut oil or vegan butter. To make this recipe egg-free, use flaxseed meal or a commercial egg replacer in equal amounts. If you're watching your sodium intake, you can reduce or omit the added salt without sacrificing too much flavor. For more helpful tips, check out resources like the American Heart Association.
Conclusion on Garlic Bread Rolls
In wrapping up our journey with garlic bread rolls, you now have a delightful recipe that’s a guaranteed crowd-pleaser. These homemade rolls add a delicious twist to any meal, making them perfect for sharing. Give them a try, and enjoy the fragrant, buttery goodness! For more tips, check out resources like King Arthur Baking to elevate your bread-making skills.
Garlic Bread Rolls!
Equipment
- large bowl
- baking dish
- KitchenAid with Dough Hook
- pastry brush
Ingredients
The Dough
- 600 g strong white bread flour plus extra for dusting
- 14 g dried active yeast
- 1 tablespoon caster sugar
- 90 g unsalted butter cold & cubed
- 275 ml full fat milk
- 1 medium egg
- 0.5 teaspoon sea salt
The Filling
- 45 g unsalted butter melted
- 4 cloves garlic finely chopped
- 1 teaspoon dried mixed herbs
- 0.5 teaspoon sea salt
- 15 g fresh parsley chopped
- 25 g parmesan grated
The Topping
- 25 g parmesan
- fresh parsley chopped
Instructions
Instructions
- Sift the flour into a large bowl, and add the caster sugar, yeast and sea salt. Mix these together so its all evenly distributed.
- Rub the butter into the mixture so it resembles bread crumbs, like you would when making scones.
- Gently heat the milk until warm - but not piping hot.
- Add the milk and egg to the dry ingredients.
- Knead the dough together for 7-10 minutes.
- Transfer into a lightly oiled bowl, and cover with cling film. Let it rise for 1-2+ hours, or until doubled in size.
- Whilst the dough is proving, prep the filling by finely chopping the garlic cloves and prepping the parsley.
- Once the dough has risen, transfer to a lightly floured work surface, and roll out to a large rectangle.
- Mix the garlic into the melted butter, and brush over the bread dough.
- Sprinkle over the mixed herbs, sea salt, chopped parsley and parmesan.
- Roll the dough from long side to long side, so that a long sausage is formed. Cut this evenly into 12 pieces.
- Using a large baking dish, put them in so they won't touch yet, in four rows of three.
- Cover the dish with cling film, and let them rise for another hour or so.
- Towards the end of the dough rising, preheat the oven to 180C/160CFan.
- Bake in the oven for 20-25 minutes, until golden brown and cooked through.
- Leave to cool, and then sprinkle over some more fresh parsley and parmesan.
Leave a Reply