
Introduction to Artisan Pizza Dough
Why make your own pizza dough?
Creating your own artisan pizza dough is not just about impressing friends at dinner parties; it’s an art that allows you to take control of flavors, textures, and the overall pizza experience. When you make pizza dough from scratch, you can customize it to your preferred taste and nutritional needs, whether you opt for whole wheat flour or keep it classic with all-purpose flour.
Moreover, the benefits of homemade dough extend beyond flavor. You can tailor the thickness, chewiness, and crispness to suit your cravings. A recent report from the Culinary Institute of America shows that homemade pizza is often healthier, allowing you to minimize preservatives and control toppings like fresh vegetables and lean proteins.
Have you ever noticed that store-bought pizzas can sometimes taste bland or overly processed? Making your artisan pizza dough at home can provide that restaurant-quality taste right in your kitchen. Plus, the satisfaction of kneading the dough and seeing it rise adds a personal touch to your culinary skills.
With just a handful of ingredients—flour, water, salt, and yeast—you can craft pizza that feels like a cozy embrace. Are you ready to roll up your sleeves and get started? Let’s dive into the recipe!
Ingredients for Artisan Pizza Dough
Creating the perfect artisan pizza dough starts with simple yet high-quality ingredients. Let’s dive into the essentials you'll need for a delightful pizza-making experience.
-
Flour: You'll want 3 and ⅔ cups of either all-purpose or whole wheat flour. The choice between these affects the texture, so pick what suits your taste. All-purpose flour gives you a classic chewy crust, while whole wheat adds a wholesome flair.
-
Water: 1 and ½ cups of water at room temperature are crucial. This activates the yeast, helping it to work its magic in creating a light and airy dough.
-
Salt: 2 teaspoons of fine sea salt enhance the flavor significantly. Don't be tempted to skip this—salt is essential for balanced taste.
-
Yeast: We’re using 2 teaspoons of instant yeast, which is a game changer for quick-rising dough. It contributes to a wonderfully airy structure and characteristic chewiness.
By choosing the right ingredients and following the steps closely, you’ll be well on your way to crafting delectable pizzas right at home. Want to learn more about the science behind these ingredients? Check out The Science of Good Cooking for in-depth insights!
Step-by-Step Preparation of Artisan Pizza Dough
Making your own artisan pizza dough is a rewarding and surprisingly simple process that results in deliciously crispy and chewy crusts. Whether you're preparing a cozy dinner or hosting a gathering, homemade pizza is always a hit. Let’s dive into the steps together!
Gather your ingredients
Before you start, gather everything you need for your artisan pizza dough. Here’s what you’ll need:
- 3 and ⅔ cups of all-purpose or whole wheat flour
- 1 and ½ cups of water, at room temperature
- 2 teaspoons of fine sea salt
- 2 teaspoons of instant yeast
Having your ingredients ready ensures a smooth and enjoyable baking experience. It’s like getting ready for a fun cooking class—having everything at hand makes you feel prepared!
Combine the dry ingredients
In a large bowl, whisk together the flour, salt, and yeast. This simple step is essential as it helps distribute the yeast evenly throughout the flour. You want that leavening action to be consistent for a perfectly risen dough. Don’t skip this; it’s foundational to achieving a great texture in your finished crust.
Mix in the water
Once your dry ingredients are nicely mixed, gradually pour in the room-temperature water. Use a rubber spatula or wooden spoon to combine everything until it forms a shaggy dough. You don’t need to knead it yet; just ensure that all the flour is incorporated. Now, shape it loosely into a ball. Think of it as giving your dough a nice little hug!
Allow the dough to rise
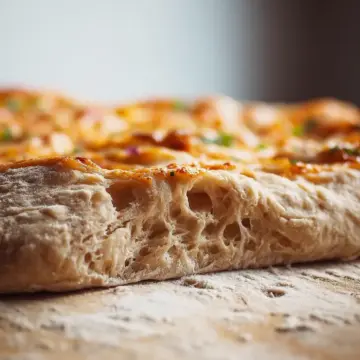
Cover the bowl with plastic wrap or a lid and let it rest at room temperature for about 2 to 3 hours, or until it has doubled in size and looks bubbly. This fermentation stage is crucial as it develops flavor and structure. If you’re feeling adventurous, consider refrigerating the dough after the first rise for up to 3 days; the longer it ferments, the more complex the flavors.
Divide and shape the dough
Now that your dough has risen beautifully, it’s time to divide it into portions. You can slice it into 4 or even 8 pieces for individual pizzas. Dust your hands with flour, scoop out one portion, and gently shape it into a round ball. Place it in the center of a lightly floured parchment sheet; this will be your canvas!
Roll out the pizza crust
To roll out your crust, flour a rolling pin, and start from the center of the dough ball, gently pressing outward. Rotate the parchment as you roll to keep the dough circular. Remember, perfection isn’t the goal—deliciousness is! If the dough resists, let it rest for 5-10 minutes to relax the gluten. This will make shaping much easier.
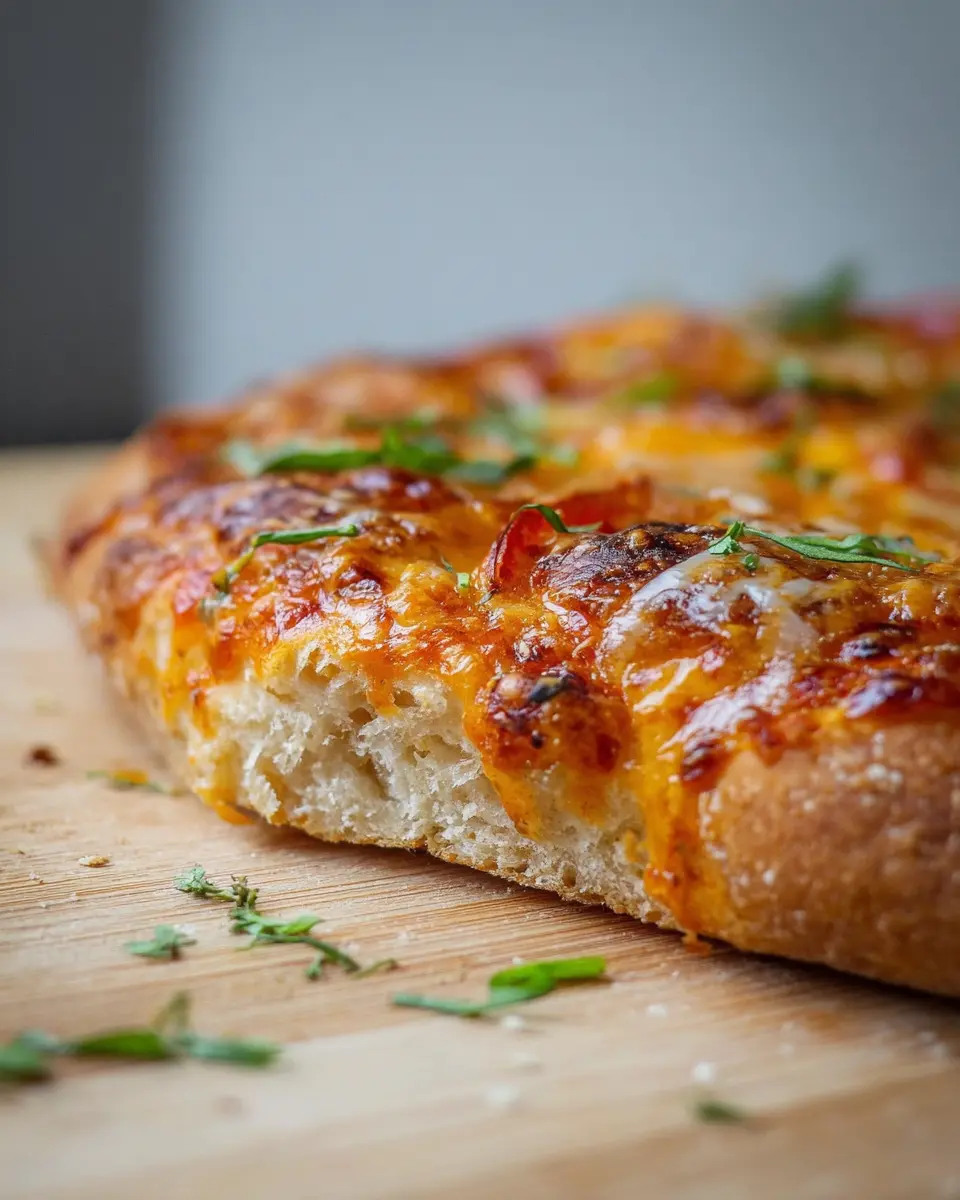
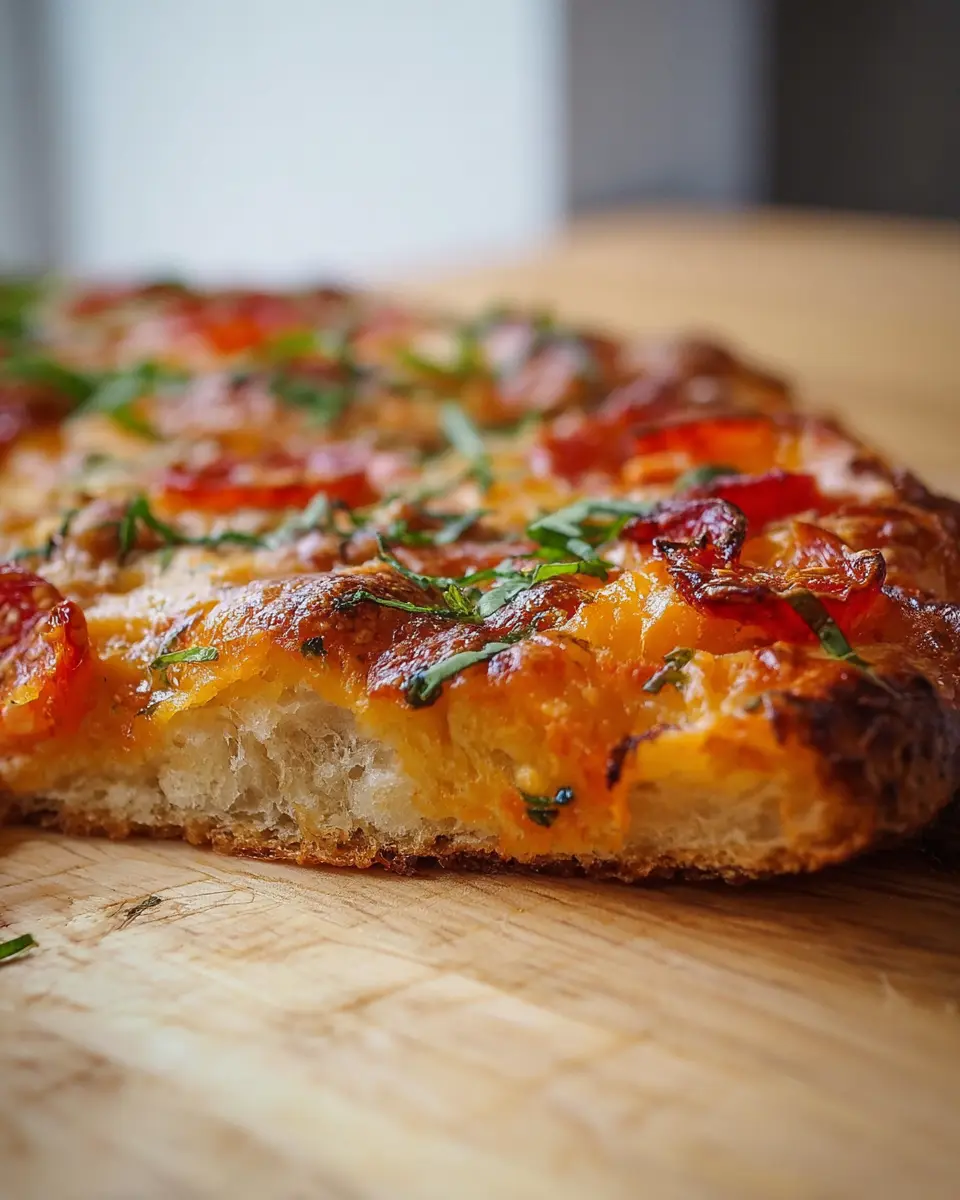
And that’s it! Follow these steps to transform your ingredients into a delightful artisan pizza dough that you can top with your favorite sauces and toppings. Enjoy it with some homemade tomato sauce or a drizzle of olive oil for a delicious homemade experience!
For more tips on dough handling and variations, check out Serious Eats for an in-depth guide on pizza-making techniques.

Variations on Artisan Pizza Dough
Whole Wheat Artisan Pizza Dough
Looking for a healthier twist on traditional artisan pizza dough? Whole wheat flour adds nuttiness and increases fiber content—perfect for those aiming for balanced nutrition. Simply replace half or all of the all-purpose flour with whole wheat flour. The dough may need a touch more water due to the flour’s absorbency, so gradually add until it reaches the desired consistency. Whole wheat pizza crusts hold toppings beautifully and bring a delightful wholesome flavor to your pies. Explore recipes for whole wheat pizza dough for a nutritious option!
Gluten-Free Artisan Pizza Dough
If you’re gluten-sensitive or simply want to mix things up, gluten-free artisan pizza dough can be just as satisfying! Use a gluten-free flour blend—typically a mix of rice flour, almond flour, and tapioca flour for the best texture. It might take a few tries to perfect the ratio, as gluten-free dough often requires added moisture. Don't forget to include xanthan gum or similar stabilizers to help mimic that chewy texture you love in traditional pizza crusts. Check out various gluten-free pizza dough recipes here for guidance!
Cooking Tips and Notes for Artisan Pizza Dough
Crafting the perfect artisan pizza dough is both an art and a science! Here are some friendly tips to elevate your pizza-making experience:
-
Kneading Technique: When combining the dough, mix just until incorporated. Too much mixing can develop gluten too early, making it tough.
-
Rising Time: Allow the dough to rise until it doubles in size. If you can resist, longer rising (up to 3 hours) can enhance flavor even more!
-
Use of Parchment Paper: Ensure your parchment can handle high temperatures. If it can’t, adjust your oven temperature accordingly to avoid burning.
-
Ingredient Quality: Quality ingredients matter! Choose fresh toppings and high-quality cheese for a deliciously memorable pizza.
For more insights on bread making, consider checking resources from the King Arthur Baking Company or Serious Eats. Enjoy your pizza night!
Serving Suggestions for Artisan Pizza Dough
Creating the perfect pizza starts with your artisan pizza dough, but the fun doesn’t stop there! Here are some delicious and creative topping suggestions to elevate your homemade pies:
Classic Combinations
- Margherita: Fresh mozzarella, tomatoes, and basil for a light, refreshing taste.
- Pepperoni & Turkey Bacon: A twist on a classic, add turkey bacon for a savory crunch.
Veggie Delight
- Mediterranean: Top with spinach, feta, olives, and sun-dried tomatoes for a tasty Mediterranean vibe.
Customize Your Own
- Experiment: Mix and match your favorites—like chicken ham, seasonal veggies, or even pineapple for a sweet touch!
Pairing Suggestions
- Drinks: Try pairing your pizza with sparkling water infused with lemon or a homemade iced tea for a refreshing balance.
These ideas are just a starting point—let your creativity run wild and enjoy every bite of your artisan pizza dough!
Time Breakdown for Artisan Pizza Dough
When you crave that perfect homemade pizza, understanding the time breakdown for artisan pizza dough can help you manage your kitchen time efficiently. Here’s a quick glance at what to expect:
Preparation Time
- 20 minutes: This includes mixing your ingredients and getting your dough ready.
Rising Time
- 2 hours: Allow your dough to rise until it’s bubbly and doubled in size. This is when the magic happens!
Total Time
- 2 hours and 30 minutes: That’s all you need for delicious artisan pizza dough, from start to finish.
For a deeper dive into pizza-making, check out Serious Eats or America’s Test Kitchen for expert tips and techniques!
Nutritional Facts for Artisan Pizza Dough
When crafting the perfect artisan pizza dough, it’s good to be aware of what you're working with. Let’s break down the essential nutritional facts to help you make informed choices.
Calories
Each serving of this delightful pizza dough contains approximately 218 calories, making it a reasonable base for your pizza creations without going overboard.
Protein
With about 7 grams of protein per serving, this artisan pizza dough not only fills you up but also helps support your active lifestyle—perfect for a post-work dinner!
Sodium
At 586 mg of sodium, this recipe provides essential flavor but be mindful if you require a lower-sodium diet. Balancing the toppings can help manage your intake!
For more nutritional insights and ways to customize your pizza, consider checking sources like USDA FoodData Central or NutritionValue for further exploration!
FAQs about Artisan Pizza Dough
How do I store leftover pizza dough?
If you find yourself with leftover artisan pizza dough, don’t worry! Store it in an airtight container or wrap it tightly in plastic wrap. Place it in the refrigerator, where it can stay fresh for up to three days. When you're ready to use it, simply bring it to room temperature before rolling it out. A little patience here makes all the difference!
Can I freeze the dough?
Absolutely! Freezing your artisan pizza dough is a great way to extend its life. After the initial rise, you can wrap the dough tightly in plastic and freeze it for up to three months. When you’re ready to make pizza, just thaw it at room temperature for 3-4 hours—it's like having homemade pizza dough at your fingertips!
What toppings pair well with artisan pizza?
The beauty of artisan pizza lies in its versatility! Some delicious topping ideas include:
- Fresh mozzarella and basil for a classic Margherita
- Grilled chicken, mushrooms, and a white sauce for a creamy twist
- Turkey bacon, spinach, and feta for a hearty, flavorful option
Mix and match based on your preferences or what’s in your fridge! For more topping inspiration, check out this guide on pizza toppings for creative combos that will have everyone asking for seconds.
Conclusion on Artisan Pizza Dough
In summary, mastering artisan pizza dough elevates pizza nights from ordinary to extraordinary. With just a few simple ingredients and steps, you can create a delicious crust that serves as the perfect base for your favorite toppings. Enjoy experimenting and share your creations with friends and family!
Artisan Pizza Dough
Equipment
- large bowl
- Rubber spatula or wooden spoon
- Plastic wrap or tight lid
- Oven
- Pizza stone
- parchment paper
- rolling pin
- Pizza peel
- baking sheet
- Cooling Rack
Ingredients
- 3.67 cups all-purpose or whole wheat flour
- 1.5 cups water at room temperature
- 2 teaspoons fine sea salt
- 2 teaspoons instant yeast
Instructions
- Stir together the flour, salt and yeast in a large bowl. Mix in the water and use a rubber spatula or wooden spoon to work the dough until fully combined. Shape loosely into a ball.
- Cover the dough with plastic wrap or a tight lid and allow to rise at room temperature for 2-3 hours until bubbly and doubled in size.
- Optional: After rising, place covered in the refrigerator for up to 3 days.
- Preheat the oven to 475 °F. Place a pizza stone on the centre rack.
- Prepare 4 sheets of parchment paper. Rip into 12 inch/30 cm long sheet and lightly flour.
- Use a knife or spatula to divide the dough into 4 (or 8 for individual pizzas). Flour your hands and scoop ¼ of the dough out of the bowl, lightly shape into a round ball and place in the centre of the prepared parchment.
- Flour a rolling pin and starting from the centre of the dough, roll out, rotating the parchment after each roll in order to shape it into a circle. If it seems tough to roll, leave it for 5-10 minutes to allow the gluten to relax.
- Top with ¼ cup of sauce, 1-2 cups of desired toppings and 1.5 cups of cheese.
- Slide the assembled pizza onto a pizza peel (still on the parchment) or the back of a large baking sheet. Carefully transfer on to the heated pizza stone.
- Bake for 9-11 minutes until the crust is golden and the cheese is lightly brown and bubbly.
- Transfer the cooked pizza off the baking stone and back onto the peel/baking sheet. Place on a cooling rack for a couple of minutes.
- Peel the parchment paper from the bottom, slice and serve.


Leave a Reply