
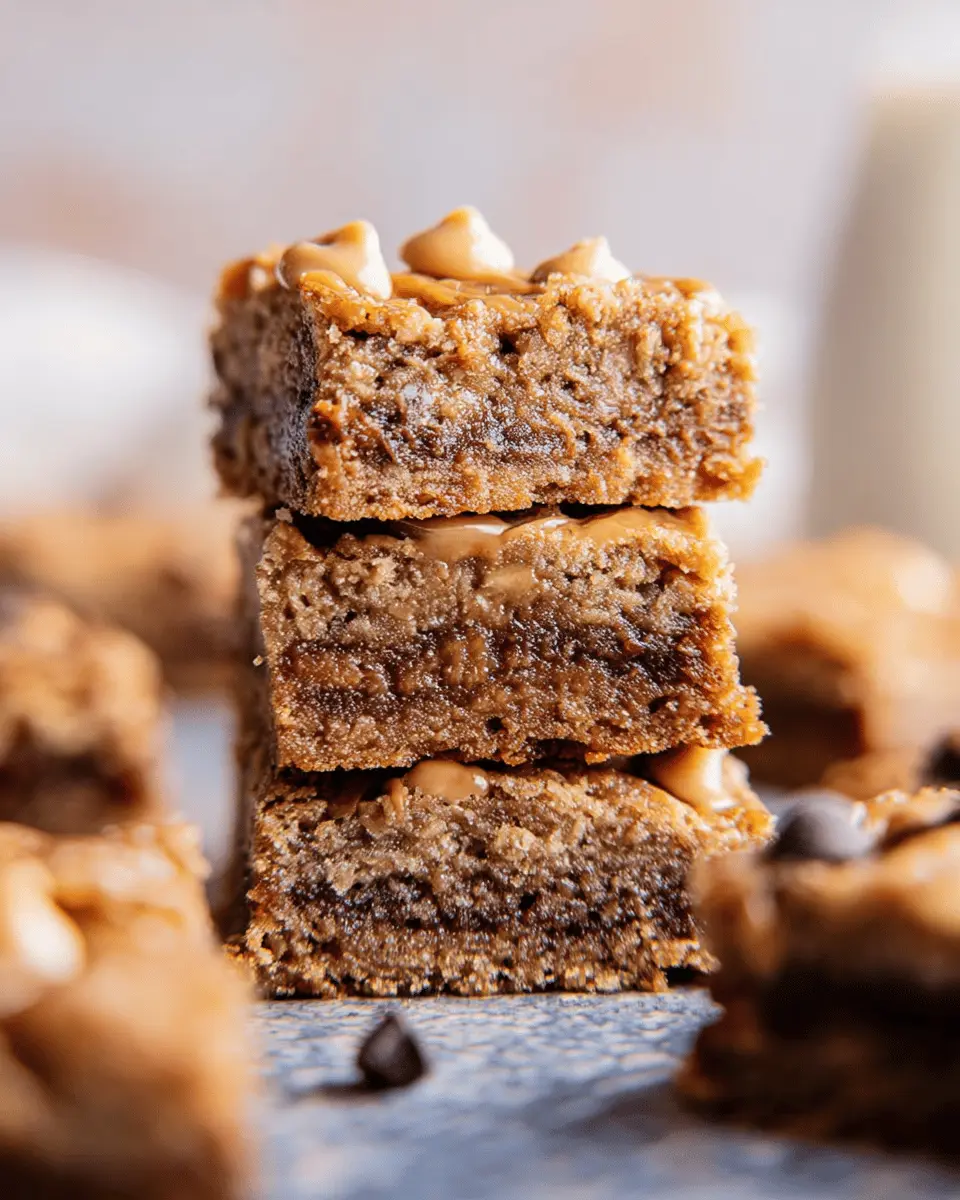
Introduction to Peanut Butter Banana Bars
Have you ever craved a snack that's both delicious and nourishing? Look no further than peanut butter banana bars! These simple yet decadent treats offer a wonderful balance of flavor and nutrition, making them ideal for any time of day—whether you need a quick breakfast or an afternoon pick-me-up.
Why Peanut Butter Banana Bars are the Perfect Snack?
These bars are packed with wholesome ingredients. The star of the show, ripe bananas, not only bring natural sweetness but also contribute essential vitamins like potassium. Meanwhile, creamy peanut butter adds a dose of healthy fats and protein, keeping you satisfied longer. With no butter, oil, or white flour required, you can indulge guilt-free.
Plus, they’re incredibly easy to make—think one bowl, minimal cleanup, and a short ingredient list! You can whip them up in just about 20 minutes, and they bake to perfection in under half an hour. This convenience makes them a perfect fit for your busy lifestyle.
Whether you're meal prepping for the week or just in need of a delicious snack, peanut butter banana bars might just become your new favorite indulgence. Ready to dive in? Let’s take a look at the recipe that will change your snacking game!
Ingredients for Peanut Butter Banana Bars
Creating irresistible peanut butter banana bars is simple with just a handful of wholesome ingredients. Let’s take a closer look at what you’ll need:
- ½ cup mashed banana: About one medium ripe banana, perfectly sweet and packed with moisture.
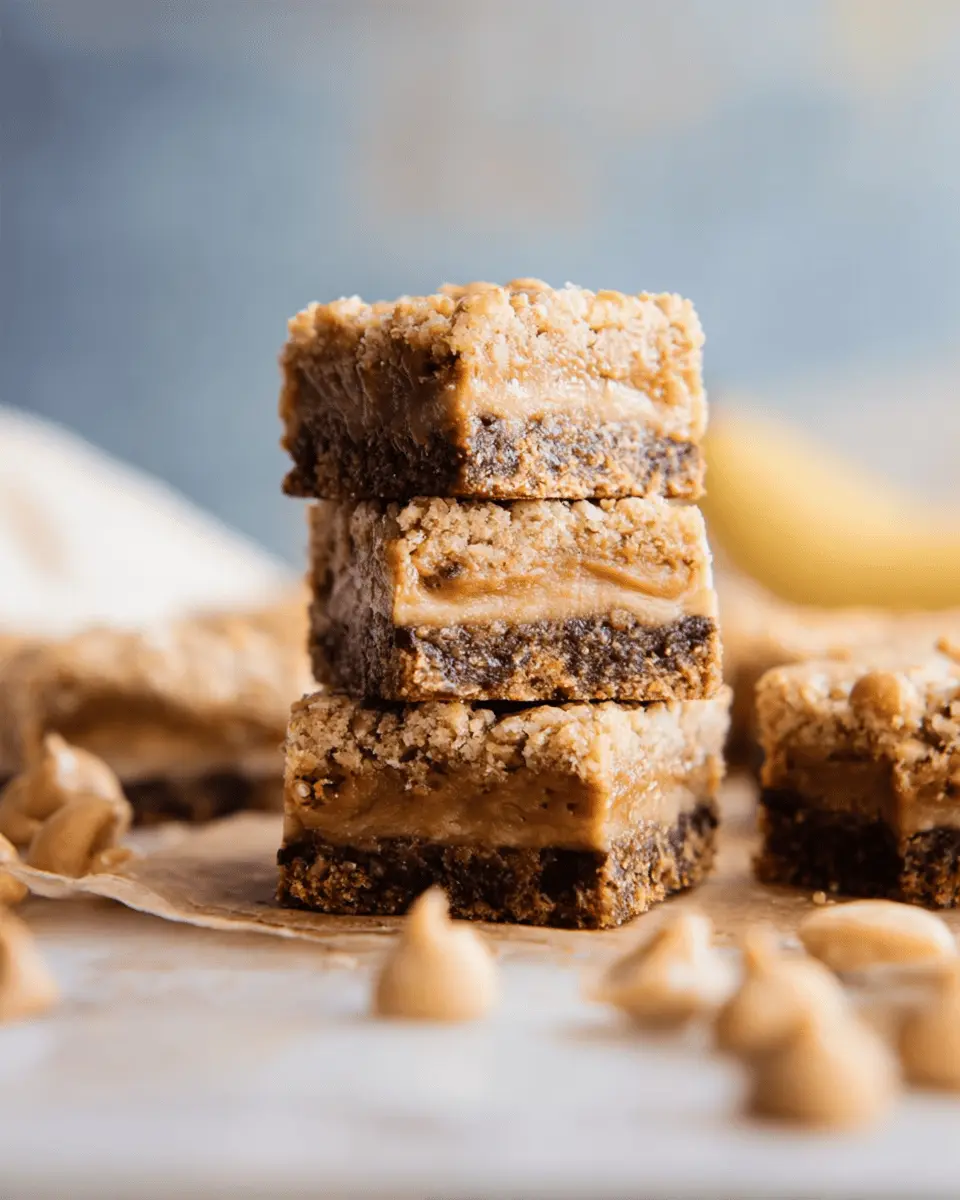
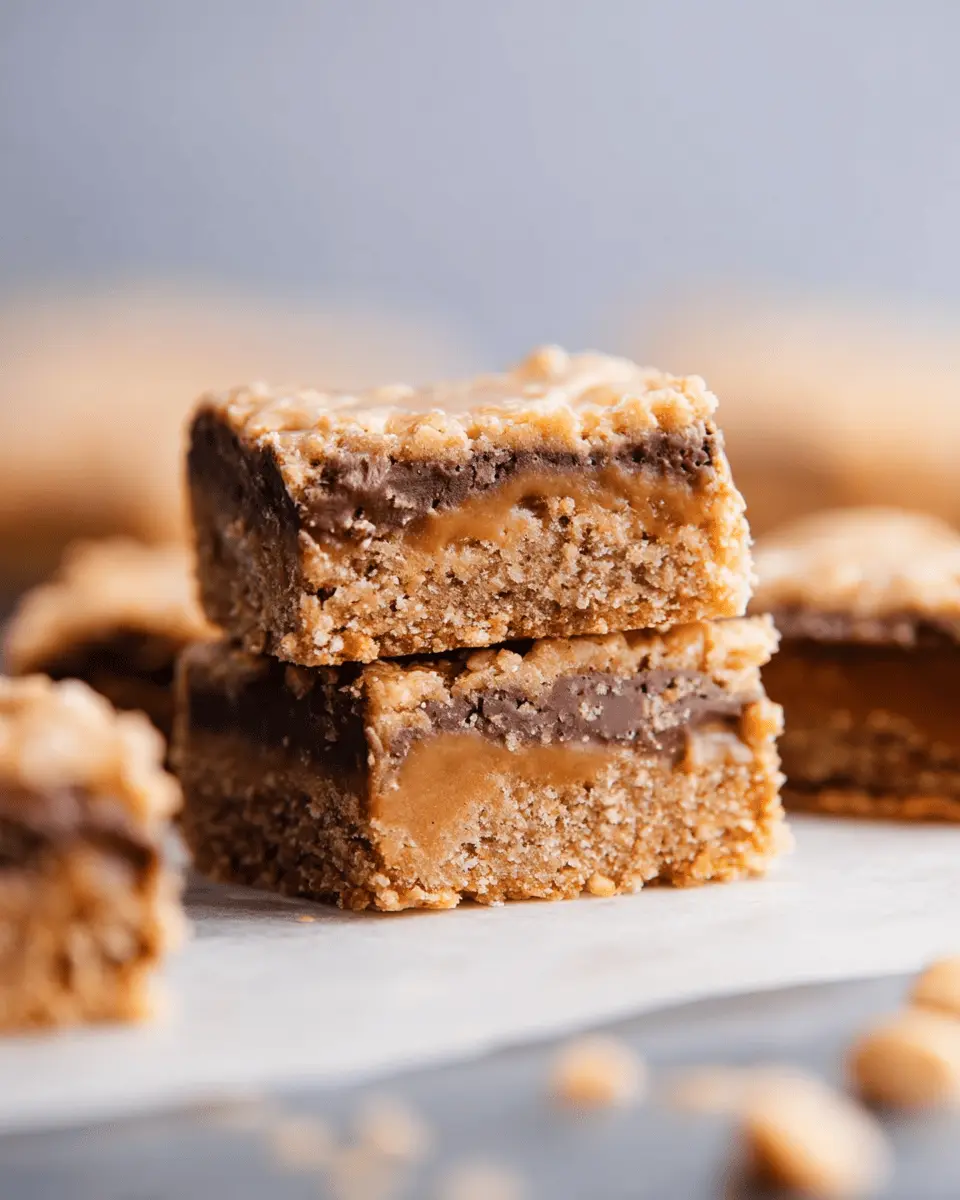
- ½ cup creamy peanut butter: A rich, nutty flavor that's essential for this recipe. I recommend using brands like Skippy or Jif for the best creamy texture.
- 2 tablespoons honey: This natural sweetener enhances the flavor while keeping the bars moist.
- 1 teaspoon vanilla extract: A splash of this adds warmth and depth to your bars.
- ¼ cup light brown sugar: Lightly packed, it adds a subtle caramel flavor that complements the banana.
- 1 large egg: This helps bind everything together, giving the bars their chewy texture.
- ¼ teaspoon salt: Even a pinch can elevate the overall taste by balancing the sweetness.
- ½ teaspoon baking soda and ¼ teaspoon baking powder: These leavening agents ensure your bars rise perfectly.
- 1 cup oat flour: You can easily make this by blending regular oats until fine.
- ½ cup peanut butter baking chips or chocolate chips: Optional, but why not add a little extra goodness?
For more recipes using banana in creative ways, check out Love and Lemons. Happy baking!
Step-by-Step Preparation of Peanut Butter Banana Bars
Are you ready to create some delightful peanut butter banana bars that are not only tasty but also healthy? Let’s walk through each step together, ensuring that your kitchen adventure is both fun and easy!
Gather Your Ingredients
First things first, gather all the ingredients you'll need. For this recipe, you’ll require:
- 1 medium banana
- ½ cup of creamy peanut butter (like Skippy)
- 2 tablespoons of honey
- 1 teaspoon of vanilla extract
- ¼ cup of packed light brown sugar
- 1 large egg
- ¼ teaspoon of salt
- ½ teaspoon of baking soda
- ¼ teaspoon of baking powder
- 1 cup of oat flour (blend regular oats for this)
- ½ cup of peanut butter or chocolate baking chips
Having everything at hand makes the cooking process smoother, and trust me—organization is key when you’re in the kitchen!
Preheat the Oven and Prepare the Baking Pan
Now, let’s get that oven fired up. Preheat it to 300°F. While that's heating, line an 8 x 8-inch baking pan with parchment paper, leaving some overhang on the sides. This will make it super easy to lift the bars out once they’re baked. If you skip this step, you might face a sticky situation trying to remove them later on!
Mash the Bananas
Once the oven is preheated, it’s time for the bananas. Peel and mash a medium banana using a fork; you want it to be nice and smooth. Measuring it after mashing is a good idea to ensure accuracy and achieve the right consistency.
Mix Wet Ingredients
In a large bowl, combine the mashed banana with the creamy peanut butter, honey, vanilla extract, and packed brown sugar. Using a hand mixer, blend until everything is beautifully combined. Then, crack in that large egg and beat it in until smooth. The mixture should have a lovely, creamy texture.
Incorporate Dry Ingredients
Next up, it's time to mix the dry ingredients. Gradually beat in the salt, baking soda, baking powder, and oat flour. The texture should start to change to that delicious batter consistency. Finally, gently fold in the peanut butter or chocolate baking chips with a spatula. This adds a delightful chocolatey or peanut-y touch!
Add Peanut Butter Chips and Pour into the Pan
With your batter ready, smoothly transfer it to the prepared pan. Use a spatula to even out the top, ensuring it spreads nicely, which helps with even baking.
Bake to Perfection
Now for the magical part: baking! Place the pan in the oven and let it bake for about 18–25 minutes. Watch closely for a golden-brown top. When the edges slightly pull away from the pan, you know they’re ready. Avoid overbaking, as nobody wants dry peanut butter banana bars.
Cool and Cut
Once you remove them from the oven, allow your bars to cool in the pan. Using the parchment overhang, lift them out after cooling for about 10–15 minutes. Cut them into bars, and voilà—your peanut butter banana bars are ready to enjoy!
These bars are perfect as a quick snack or a healthy dessert and can be stored for freshness for up to a week in an airtight container. Enjoy every bite with your favorite beverage, whether it’s a cup of herbal tea or a refreshing smoothie!
Variations on Peanut Butter Banana Bars
Adding Nuts or Seeds
Enhance the texture of your peanut butter banana bars by folding in some chopped nuts or seeds! Walnuts, almonds, or sunflower seeds can add a delightful crunch and boost the nutritional value. Plus, if you're feeling adventurous, you could even try a mix—maybe some chia seeds for added fiber and omega-3s! Just toss in about a half-cup to your batter for an irresistible, nutty bite.
Swapping Chocolate Chips for Peanut Butter Chips
Although chocolate chips offer a classic sweetness, why not switch it up and use peanut butter chips instead? They’ll lend a rich, creamy flavor that pairs beautifully with bananas. Not a fan of sweet? Opt for dark chocolate chips for a semi-sweet twist. This simple swap can elevate your peanut butter banana bars from good to incredible in just one step!
Cooking Tips and Notes for Peanut Butter Banana Bars
When it comes to making peanut butter banana bars, simplicity and quality ingredients are key. Here are some helpful tips:
-
Banana Ripeness: Use a very ripe banana for maximum sweetness and flavor. This naturally sweetens the bars, potentially reducing the need for added sugar.
-
Oat Flour: If you don’t have oat flour on hand, simply blend rolled oats until you reach a fine consistency. It’s a great way to add extra fiber!
-
Don’t Overbake: Keep an eye on your bars around the 18-minute mark. A golden top indicates they’re likely done. Overbaking can lead to dry bars!
-
Storage: For optimal freshness, store your peanut butter banana bars in an airtight container. They can last up to a week in the fridge!
Serving Suggestions for Peanut Butter Banana Bars
These peanut butter banana bars make a deliciously versatile treat! Here are some delightful serving suggestions:
-
Pair with Fresh Fruit: Enhance your dessert experience by serving the bars with a side of sliced strawberries or blueberries. The fruity freshness complements the richness of the bars perfectly.
-
Nutty Boost: Sprinkle chopped nuts, like almonds or walnuts, on top for an extra crunch. This adds texture and a protein punch.
-
Spread it Out: Enjoy these bars with an additional layer of peanut butter or a drizzle of honey for a decadent twist.
-
Coffee Companion: Grab a cup of your favorite coffee or herbal tea to pair with these bars, making for a perfect afternoon snack.
These versatile peanut butter banana bars are sure to satisfy any craving!
Time Breakdown for Peanut Butter Banana Bars
Preparation Time
Getting everything ready for your peanut butter banana bars is a breeze! You’ll need about 20 minutes to mash the bananas, mix the ingredients, and prepare the baking pan. A little organization goes a long way!
Baking Time
Once your mixture is in the pan, pop it in the oven and set a timer for 18 to 25 minutes. You'll know they're ready when they're lightly golden brown and start pulling away from the edges of the pan.
Total Time
In just 42 minutes, you can transform simple ingredients into delicious peanut butter banana bars. It’s quick and rewarding—perfect for a healthy dessert or snack!
For more tips on perfecting your baking skills, check out the ultimate guide to baking. Happy baking!
Nutritional Facts for Peanut Butter Banana Bars
When you're indulging in these peanut butter banana bars, it's nice to know they're not just delicious but also nutritious!
Calories
Each bar contains about 111 calories, making them a satisfying, guilt-free snack.
Protein
With 3.3 grams of protein per serving, these bars help keep you full and energized throughout your day.
Sugar
Each bar has approximately 7.3 grams of sugar, primarily from natural sources like bananas and honey—better than refined sugars!
Enjoy these bars guilt-free, knowing that they're both tasty and nourishing! For more on healthy snacks, check out Healthline's article on nutritious snack options.
FAQs about Peanut Butter Banana Bars
Can I substitute the peanut butter?
Absolutely! While creamy peanut butter is a star in these peanut butter banana bars, you can swap it out for almond butter, sun butter, or even a nut-free option like soy nut butter. Just keep in mind that these substitutions may slightly alter the flavor and texture, but they’ll still yield delicious results!
How should I store Peanut Butter Banana Bars?
To keep your peanut butter banana bars fresh, store them in an airtight container at room temperature for about 2 to 3 days. Alternatively, you can keep them in the fridge for up to a week. If you’re feeling generous, share some with friends (or don’t — no judgment here!).
Can I freeze these bars?
Yes, you can! These bars freeze beautifully. Cut them into individual servings and wrap them tightly in plastic wrap or foil, then place them in a freezer-safe container. They’ll last for up to three months. Just thaw at room temperature or microwave briefly when you’re ready to enjoy! For more tips on freezing baked goods, check out this handy guide.
Conclusion on Peanut Butter Banana Bars
In conclusion, peanut butter banana bars are a delightful and nutritious treat perfect for any occasion. With their simple ingredients and easy preparation, they’re an excellent choice for a quick snack or a sweet dessert. Give this recipe a try, and enjoy all the deliciousness they offer!

Peanut Butter Banana Bars
Equipment
- 8 x 8-inch baking pan
- parchment paper
- Hand mixer
- blender or food processor
Ingredients
- ½ cup banana 1 medium banana
- ½ cup creamy peanut butter I use Skippy
- 2 tablespoons honey
- 1 teaspoon vanilla extract
- ¼ cup light brown sugar lightly packed, see note 1
- 1 large egg
- ¼ teaspoon salt
- ½ teaspoon baking soda
- ¼ teaspoon baking powder
- 1 cup oat flour just oats that have been blended up, see note 2
- ½ cup peanut butter baking chips or chocolate chips
Instructions
- Preheat oven to 300°F. Line an 8x8 baking pan with parchment paper with an overhang for easy removal. These bars are near impossible to remove from an unlined pan. I wouldn’t recommend using foil.
- Remove the banana peel and mash well using a fork. Measure after it has been well mashed.
- In a large bowl, using a hand mixer, cream together the mashed up banana, peanut butter (don’t warm it up), honey, vanilla extract, and brown sugar. Beat until completely combined. Beat in the egg until incorporated.
- Beat in the salt, baking soda, baking powder, and oat flour (see note 2). Add the peanut butter chips and fold in with a spatula.
- Using a spatula, transfer the mixture into the prepared pan and smooth the mixture into an even layer. Bake 18–25 minutes or until lightly golden brown and bars have slightly pulled away from the edges. Be careful to not overbake or they end up dry and less flavorful.
- Remove and allow them to cool before using the parchment overhang to pull the bars from the pan. Cut into bars and enjoy! Bars are best enjoyed within 1–2 days. (They have a tendency to get moist as they’re stored.)
Leave a Reply