
Introduction to Homemade Banana Pudding
When it comes to classic comfort foods, few desserts evoke as much nostalgia as homemade banana pudding. This delightful treat pairs creamy pudding with the natural sweetness of ripe bananas and the crunch of vanilla wafers, creating a fantastic harmony of flavors and textures that transport many of us back to our childhood kitchens.
Homemade banana pudding stands out not just for its taste but also for its customization possibilities. You can elevate the dish by adding a touch of nutmeg or incorporating a hint of chocolate for a twist. According to research, comfort foods help to evoke feelings of warmth and security, making them the perfect pick-me-up after a hectic day.
Whether it’s a family gathering or a simple weeknight dinner, serving homemade banana pudding can turn an ordinary moment into a cherished memory. And let's not forget—there's something incredibly satisfying about preparing a dish from scratch, especially one that has been passed down through generations.
So, if you’re ready to impress your friends or treat yourself, this homemade banana pudding recipe is just the ticket. Ready to dive in? Let’s take a closer look at how to create this timeless dessert!
Ingredients for Homemade Banana Pudding
Essential ingredients for the perfect pudding
Creating the ultimate homemade banana pudding relies on some key ingredients that come together to form a creamy, delicious dessert. Here’s what you’ll need:
- ⅔ cup white sugar
- ⅓ cup all-purpose flour
- ¼ teaspoon salt
- 3 large eggs, beaten
- 2 cups milk
- 2 tablespoons butter, softened
- ½ teaspoon vanilla extract
- 2 bananas, peeled and sliced
- ½ (12-ounce) package vanilla wafer cookies
These staples ensure a rich texture and delightful flavor. The combination of eggs and milk gives the pudding its creamy base while the vanilla extract adds a soothing warmth.
Optional add-ins to enhance flavor
Want to take your homemade banana pudding to the next level? Consider adding:
- Cinnamon or nutmeg: A sprinkle can elevate the taste profile significantly.
- Chocolate shavings: For those indulgent chocolate lovers out there.
- Whipped cream: Offering a light, airy finish when served.
- Toasted coconut flakes: For a tropical twist that complements the bananas beautifully.
Feel free to customize these options to suit your taste! Discover more about flavor pairings through sources like Food Network for inspiration. Happy cooking!
Preparing Homemade Banana Pudding
There's something undeniably comforting about homemade banana pudding. Whether it’s a gathering or a quiet night at home, this classic dessert brings back a wave of nostalgia. Let’s dive into the preparation process step-by-step!
Gather and prepare all ingredients
Before embarking on your banana pudding adventure, it’s essential to have everything ready. Check your kitchen and gather the following items:
- ⅔ cup white sugar
- ⅓ cup all-purpose flour
- ¼ teaspoon salt
- 3 large eggs, beaten
- 2 cups milk
- 2 tablespoons butter, softened
- ½ teaspoon vanilla extract
- 2 bananas, peeled and sliced
- ½ (12 ounce) package vanilla wafer cookies
Having everything organized not only speeds up the process but also minimizes kitchen chaos. A little tip: consider measuring your ingredients out beforehand so you can seamlessly transition between steps.
Combine and cook the pudding mixture
In a medium saucepan, start by whisking together the sugar, flour, and salt. This simple mixture is the base for your pudding. Next, carefully whisk in the beaten eggs and milk. It’s important to cook the mixture over low heat while stirring constantly. This allows the ingredients to blend harmoniously without burning. Patience is key here; it can take up to 15 minutes until the mixture thickens enough to coat the back of a spoon. For insights on cooking custards, check out Serious Eats.
Cool and incorporate butter and vanilla
Once your mixture is thickened, remove it from the heat. Stir it continually until it cools slightly; this helps prevent a skin from forming on top. Now, whisk in the softened butter and vanilla extract until everything is smooth and combined. The vanilla adds a warmth that elevates the flavor of your homemade banana pudding. If you’re a fan of experimenting, you can mix in a pinch of cinnamon for an extra flavor note!
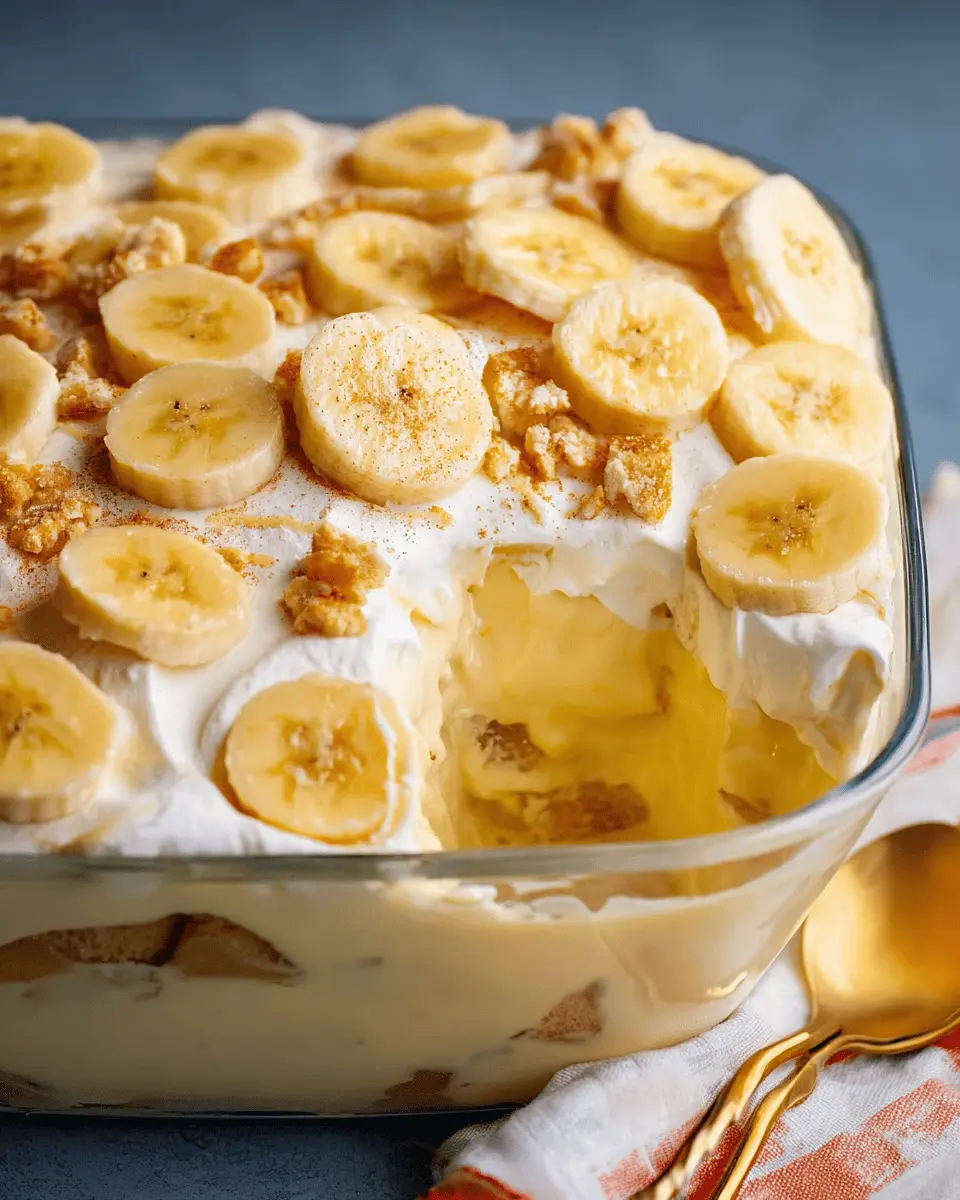
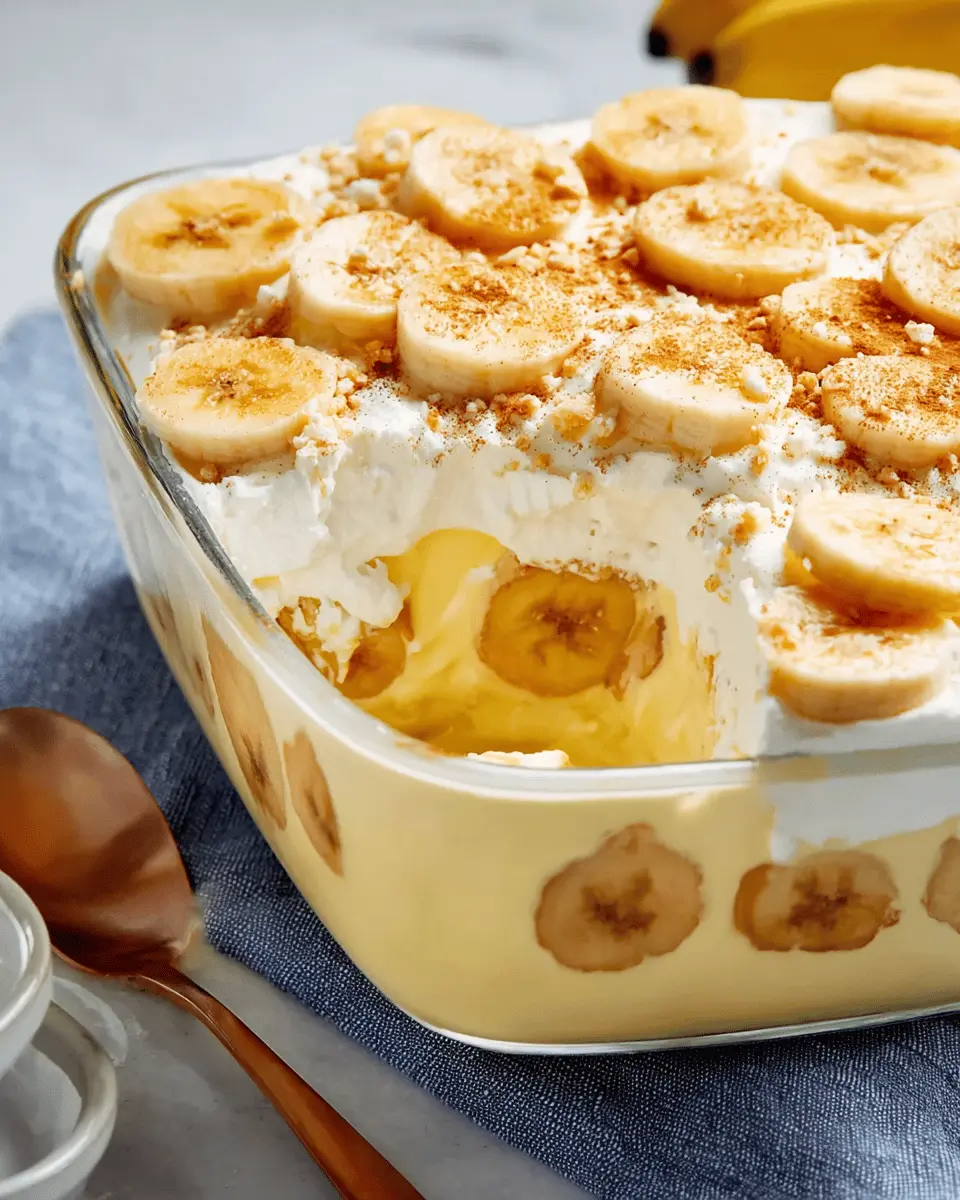
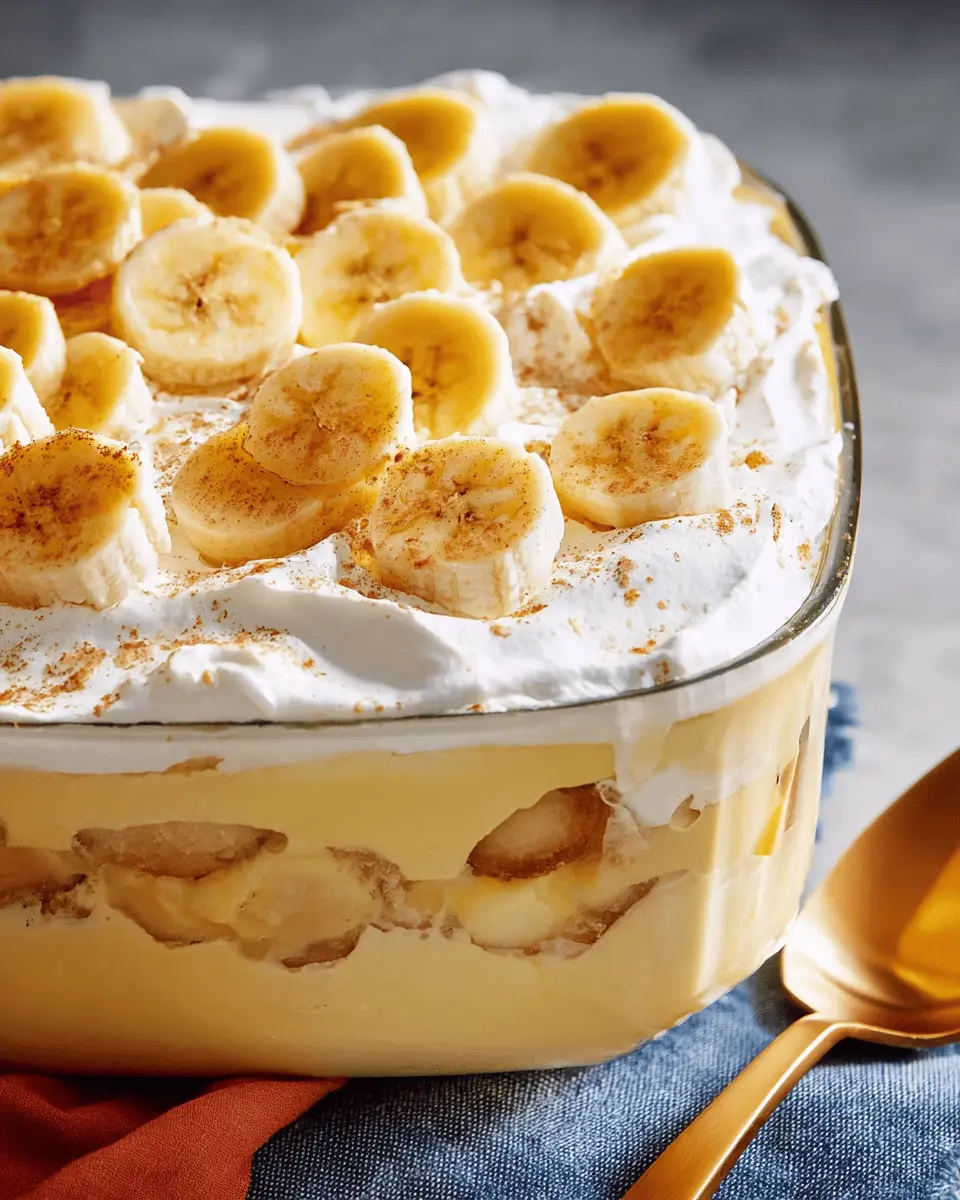
Layer with bananas and vanilla wafers
Now it’s time for the fun part! In a large serving dish, begin by spreading a layer of your pudding mixture at the bottom. Then, add a layer of sliced bananas followed by a layer of vanilla wafer cookies. Repeat these layers, creating a beautiful visual masterpiece. The crunchiness of the wafers contrasts beautifully with the smooth pudding and soft bananas, making each bite delightful.
Chill and serve
For the final touch, cover your layered pudding with plastic wrap and chill it in the refrigerator for at least an hour. Chilling allows the flavors to meld together, ensuring a deliciously creamy texture. When it’s time to serve, consider a dollop of whipped cream or a sprinkle of crushed wafers for added presentation. Enjoy this nostalgic treat that’s sure to become a favorite in your household just like it did in mine!
As you dive into this homemade banana pudding recipe, remember to savor the joyous moments that come with sharing delicious food.
Variations on Homemade Banana Pudding
Chocolate Banana Pudding Twist
If you're a chocolate lover, consider adding cocoa powder directly into your homemade banana pudding for a rich twist. Simply mix in about ¼ cup of unsweetened cocoa during the initial cooking phase. Layer in some chocolate wafer cookies instead of vanilla wafers for that extra chocolate hit. This variation marries the classic banana flavor with a decadent chocolate experience, turning your dessert into a scrumptious delight!
Peanut Butter and Banana Pudding Fusion
Who can resist the creamy goodness of peanut butter? Mix in some smooth peanut butter—around ½ cup—into your pudding base, and watch the magic happen! This peanut butter and banana pudding fusion takes the traditional recipe up a notch. You can also add chopped peanuts as a topping for a delightful crunch. It’s a perfect sweet treat that balances the richness of peanut butter with the sweetness of bananas. Who says you can’t have fun with dessert? Check out Serious Eats for more unique variations on classic recipes!
Cooking Tips for Homemade Banana Pudding
Achieving the Perfect Pudding Consistency
To create that creamy, velvety texture in your homemade banana pudding, the key is to cook your mixture slowly over low heat. Patience is essential—constantly stir until it thickens and can coat the back of a spoon. If you notice any lumps, simply whisk vigorously to smooth it out, or strain the mixture for an even creamier dessert.
Tips for Preventing Browning of Bananas
Bananas can brown quickly, which might affect the appearance of your delicious banana pudding. To keep them looking fresh, slice the bananas just before layering them into your pudding and consider tossing them in a bit of lemon juice. It’s a simple trick that helps maintain their vibrant color without altering the flavor.
For more tips on preserving fruit, check out this article on fruit storage techniques.
Serving Suggestions for Homemade Banana Pudding
Creative Serving Ideas for Gatherings
When it comes to homemade banana pudding, presentation can elevate this classic dessert. Consider serving individual portions in mason jars for a charming touch at your next gathering. Not only does this make it easier for guests to enjoy, but it also adds a rustic vibe to your event. Alternatively, you can create a banana pudding parfait by layering the pudding with additional sliced bananas and crushed vanilla wafers in a clear dish to showcase the beautiful layers.
Pairing Suggestions with Beverages and Snacks
Homemade banana pudding pairs wonderfully with a range of beverages. For a refreshing contrast, serve it alongside a cool iced tea or lemonade. If you're aiming for something cozy, a cup of hot chocolate works beautifully too. As for snacks, consider complementary options like crunchy fruit chips or even some turkey bacon bites to balance the sweetness of the pudding. These combinations not only enhance flavors but also create a delightful tasting experience for your guests!
Time Breakdown for Homemade Banana Pudding
Preparation Time
Getting everything ready for your homemade banana pudding takes just about 10 minutes. It’s the perfect time to gather your ingredients and create a cozy baking atmosphere in your kitchen.
Cooking Time
The cooking might feel like a breeze—20 minutes of stirring and watching your pudding transform into a velvety delight. Just keep an eye on it to avoid any mishaps!
Total Time
Once you factor in chilling the pudding, you’re looking at a total time of 1 hour and 30 minutes. Most of this time is hands-off as it cools in the fridge, just begging to be tasted.
If you love cooking, check out our friends at Bon Appétit for more tips on perfecting your pudding skills!
Nutritional Facts for Homemade Banana Pudding
Calories and Macronutrients
Homemade banana pudding packs in about 580 calories per serving. You'll find 19g of total fat, including 8g of saturated fat, along with 13g of protein. The dessert also has 92g of carbohydrates, which is excellent for a sweet treat.
Vitamins and Minerals
This delightful dessert isn’t just tasty; it also offers essential nutrients! With 5mg of vitamin C and 189mg of calcium per serving, homemade banana pudding can contribute to your daily intake. Plus, it's a good source of potassium at 490mg, helping support heart health.
Enjoy making this nostalgic treat! For more on the benefits of bananas, check out this Healthline article.
FAQ about Homemade Banana Pudding
How do I store leftover banana pudding?
If you find yourself with leftover homemade banana pudding, don't worry! Simply cover it with plastic wrap or transfer it to an airtight container, and store it in the refrigerator. It will keep well for up to 3 days. Just remember, the bananas may start to brown as time goes on, so enjoy it while it's fresh!
Can I make banana pudding ahead of time?
Absolutely! In fact, making your banana pudding ahead of time can enhance the flavors as they meld together. You can prepare the pudding mixture and layer it with bananas and vanilla wafers, then chill it for at least one hour in advance. For the best taste and texture, aim to serve it within 2 days of preparation.
What can I use instead of vanilla wafers?
If you're looking for alternatives to classic vanilla wafers, consider using graham crackers, shortbread cookies, or even layers of ladyfingers for a unique twist. Each option brings a different texture and flavor, so feel free to experiment and find your favorite addition to homemade banana pudding!
For more tips on banana pudding, check out AllRecipes or Food Network.
Conclusion on Homemade Banana Pudding
In summary, homemade banana pudding is a delightful treat that combines creamy layers of custard, sweet bananas, and crunchy vanilla wafers. This cherished family recipe is not only easy to make but also brings a touch of nostalgia to any gathering. Enjoy this classic dessert at your next event!
For more delicious dessert ideas, check out resources like The Spruce Eats or BBC Good Food.

Homemade Banana Pudding
Equipment
- medium saucepan
- Whisk
- serving dish
Ingredients
- ⅔ cup white sugar
- ⅓ cup all-purpose flour
- ¼ teaspoon salt
- 3 large eggs, beaten
- 2 cups milk
- 2 tablespoons butter, softened
- ½ teaspoon vanilla extract
- 2 bananas, peeled and sliced
- ½ (12 ounce) package vanilla wafer cookies
Instructions
- Gather all ingredients.
- Combine sugar, flour, and salt together in a medium saucepan. Whisk in eggs and milk; cook mixture over low heat, stirring constantly (and patiently), until mixture has thickened enough to coat the back of a spoon, up to 15 minutes.
- Remove from heat and continue to stir until pudding has cooled slightly; whisk in butter and vanilla until incorporated and smooth.
- Spread pudding into a large serving dish; layer with sliced bananas and vanilla wafers.
- Chill at least 1 hour in the refrigerator before serving.
Leave a Reply