
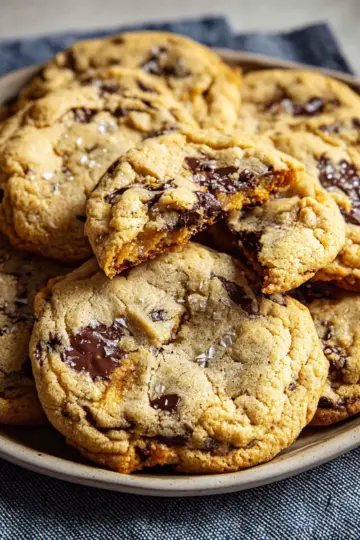
Introduction to Classic Peanut Butter Blossoms
When we think about beloved holiday cookies, classic peanut butter blossoms certainly top the list. These cookies bring together two soulmates in the dessert world: a soft, chewy peanut butter cookie and a velvety chocolate kiss. But what truly makes them special is their nostalgia—many of us associate them with family baking sessions during the festive season.
Why are peanut butter blossoms a beloved cookie?
Peanut butter blossoms aren’t just a pretty face; their delightful flavor and texture create a truly heartwarming experience. The creamy peanut butter adds richness, while the sugar coating provides a satisfying crunch before giving way to that familiar melt-in-your-mouth chocolate. According to baking experts, this quintessential cookie's balance of flavors keeps taste buds coming back for more.
Beyond taste, these cookies have a unique charm. They are simple enough for anyone to make, yet they bring a touch of elegance to any holiday gathering. You can quickly whip them up in under two hours—including chilling time—and they are a fantastic way to involve kids in the kitchen. So, why not gather your ingredients and create a batch of these classic peanut butter blossoms? Your friends and family will thank you!
For more tips on recipe variations, check out Sally's Baking Addiction for expert baking advice.
Ingredients for Classic Peanut Butter Blossoms
When it comes to baking classic peanut butter blossoms, having the right ingredients is essential for that unbeatable flavor and texture. Let’s dive into what you’ll need!
Essential ingredients for the classic flavor
- All-Purpose Flour: 1 and ¼ cups, gives the cookies structure.
- Baking Soda: Just ½ teaspoon helps the cookies rise.
- Salt: A pinch (¼ teaspoon) enhances the sweetness.
- Unsalted Butter: ½ cup, softened for creaminess.
- Brown Sugar & Granulated Sugar: This combo—½ cup brown and ¼ cup white—adds moisture and depth.
- Large Egg: Binding all together.
- Creamy Peanut Butter: ¾ cup is your star player, providing that rich flavor.
- Pure Vanilla Extract: 1 teaspoon adds warmth.
- Chocolate Kisses: 24 unwrapped, for that iconic burst of chocolate.
For comprehensive guidance on measuring baking ingredients, check out Sally's measuring tips.
Optional ingredients for customization
You can easily switch things up or add a personal twist! Consider these options:
- Sanding Sugar: Use a mix of green and red for festive flair.
- Nut Butter Alternatives: Almond or sunflower seed butter can be fun substitutions, though the texture may vary.
Feel free to experiment—after all, baking is all about making it your own!
Step-by-step Preparation of Classic Peanut Butter Blossoms
Step 1: Gather your ingredients
Before diving into the joy of baking classic peanut butter blossoms, make sure you have all your ingredients lined up. You'll need:
- All-purpose flour
- Baking soda
- Salt
- Unsalted butter (softened)
- Brown sugar
- Granulated sugar
- An egg
- Creamy peanut butter
- Pure vanilla extract
- Chocolate kiss candies for that delicious topping!
Getting organized not only simplifies the process but also makes it more enjoyable as you can focus on creating.
Step 2: Mix the dry ingredients
In a medium bowl, whisk together the all-purpose flour, baking soda, and salt. This step might seem small, but it's crucial for evenly distributing the leavening agent through your classic peanut butter blossoms dough. Set this bowl aside and let the magic of science begin!
Step 3: Cream together the butter and sugars
In a large bowl (or using a stand mixer, if you have one), beat the softened butter at high speed until it becomes creamy. This should take about one minute. Once creamy, gradually add the brown sugar and granulated sugar, mixing until everything is smooth and combined—about two minutes. If you're unsure about creaming butter properly, this guide on how to cream butter and sugar can be a great resource!
Step 4: Incorporate the egg and peanut butter
Next, it's time to add in the egg and peanut butter. Add your room-temperature egg into the mix and beat until fully combined, which should only take about a minute. Scraping down the sides of the bowl is key here! Then, mix in the creamy peanut butter and vanilla extract until everything is well blended—your batter is starting to look good!
Step 5: Combine wet and dry ingredients
It's finally time to combine your wet and dry mixtures. Gradually add the flour mixture to the peanut butter mixture, mixing on low speed. You want a creamy and deeply fragrant dough, perfect for shaping into cookies later on.
Step 6: Chill the dough for optimal texture
Don’t skip this important step! Cover the bowl with the dough and chill it in the refrigerator for at least an hour (or up to three days!). Chilling helps firm up the dough, ensuring that your classic peanut butter blossoms maintain their shape while baking.
Step 7: Shape and coat the cookies
When you're ready to bake, preheat your oven to 350°F (177°C). Using a cookie scoop or your hands, shape the chilled dough into about one heaping tablespoon-sized balls. Roll each ball in granulated sugar or festive sanding sugar for a holiday touch; this gives them that classic sparkle!
Step 8: Bake and add the chocolate kisses
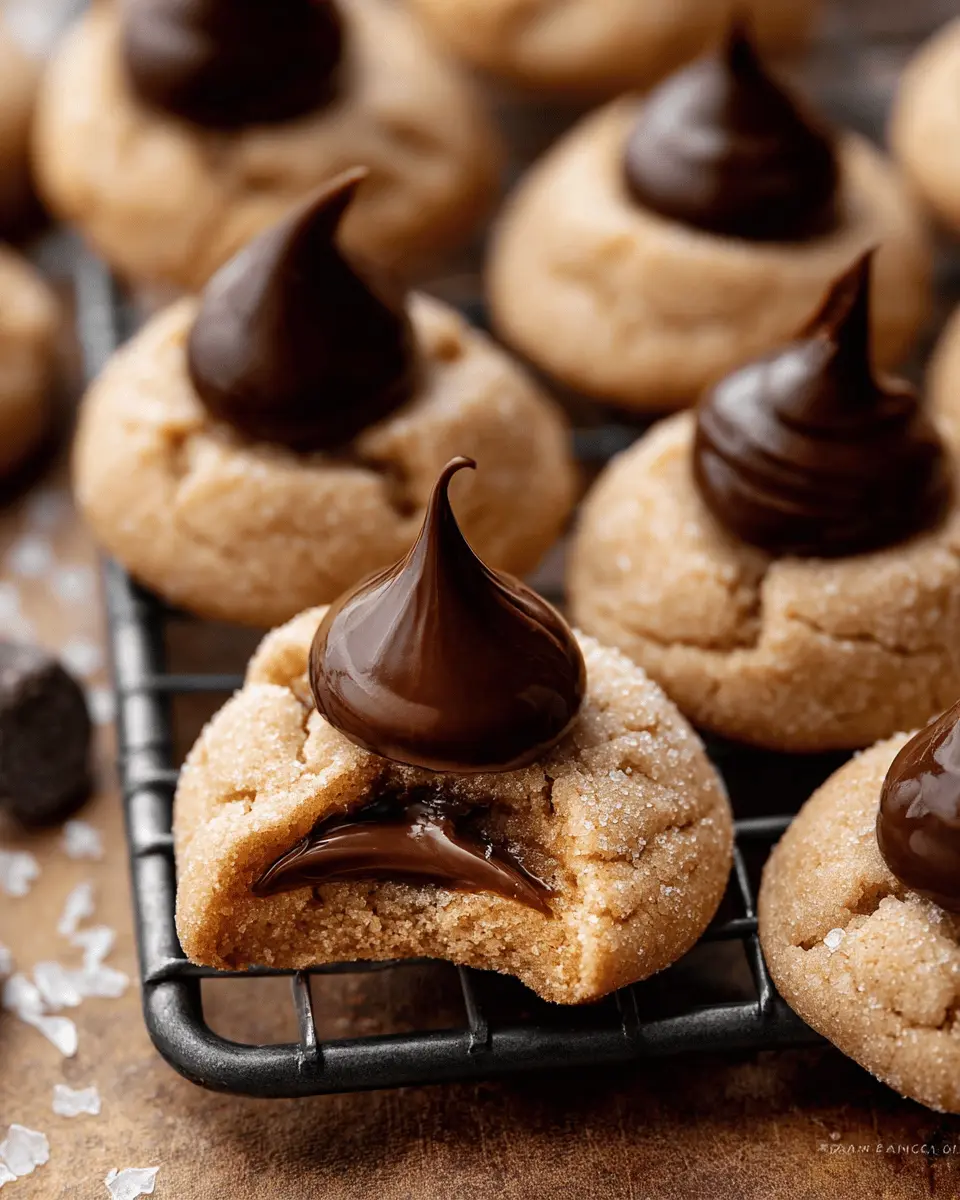
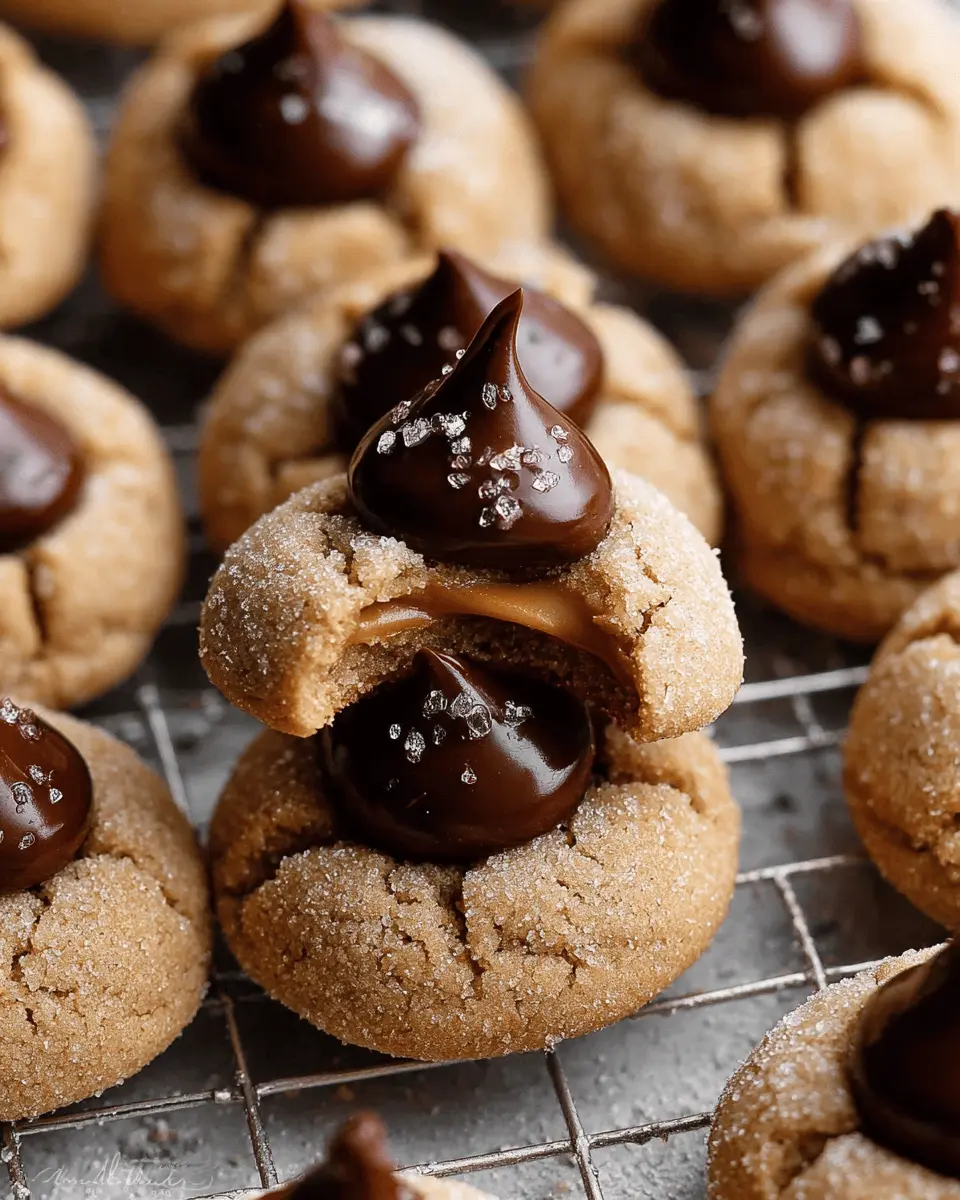
Arrange the dough balls on baking sheets lined with parchment paper, about three inches apart. Bake for 11-13 minutes, or until the tops begin to crack. Once they come out of the oven, gently press a chocolate kiss into the center of each cookie for that signature look.
Step 9: Cool and set
Allow your cookies to cool on the baking sheet for about five minutes before transferring them to a cooling rack. For optimal results, place them in the freezer for ten minutes. This little trick helps the chocolate kisses set perfectly without melting!
Now that you know how to prepare these delightful classic peanut butter blossoms, you’ll be ready to impress friends and family alike. Happy baking!

Variations on Classic Peanut Butter Blossoms
Gluten-Free Versions Using Almond Flour
If you're looking for a gluten-free twist on your classic peanut butter blossoms, almond flour is a stellar substitute for all-purpose flour. Not only does it lend a slightly nutty flavor, but it also keeps the cookies soft and chewy. Just replace the flour cup-for-cup with almond flour, and enjoy these decadent cookies even if you’re avoiding gluten!
Alternative Nut Butters for Different Flavors
Want to switch things up? Try using other nut butters like almond or cashew butter! These alternatives bring their own unique flavors to the classic peanut butter blossoms, adding a delightful twist. Let your creativity flow — blend a variety of nut butters or choose one with added spices, like cinnamon raisin or honey-roasted, for an exciting flavor profile.
For more about nut butter varieties, check out The Nut Butter Co. and explore some great options. Your taste buds will thank you!
Baking Tips and Notes for Classic Peanut Butter Blossoms
How to Ensure Perfect Texture
To achieve cookies that are soft and thick, be sure to chill your dough for at least one hour, as this allows the fats to solidify. Using room-temperature ingredients, especially the butter and egg, creates a nice creamy mixture, which is key for texture. It's also essential to mix the dough just until combined; overmixing can lead to tougher cookies.
Storing Tips for Freshness
To keep your classic peanut butter blossoms fresh and delicious, store them in an airtight container at room temperature for up to a week. For extended freshness, consider freezing the baked cookies for up to three months. Simply layer them between parchment paper to prevent sticking, and when you're ready to enjoy, let them thaw at room temperature!
For more tips on storing cookies, check out this article on cookie preservation strategies.
Serving Suggestions for Classic Peanut Butter Blossoms
Pairing Cookies with Milk Alternatives
What’s better than enjoying your classic peanut butter blossoms with a cool glass of milk? Consider pairing them with plant-based milk options like almond, oat, or soy milk for a delightful twist. These alternatives not only complement the rich peanut flavor but can also cater to different dietary preferences. Try unsweetened almond milk for a lighter touch or creamy oat milk for a luxurious experience. Check out Healthline for a breakdown of various milk alternatives.
Creative Presentations for Parties
When hosting a gathering, think beyond the plate! Display your classic peanut butter blossoms in a charming tiered stand or on a colorful platter. You can even pack them into fun gift boxes for guests to take home. For a festive touch, use holiday-themed liners when baking; a small detail that elevates your presentation! Adding decorative touches like ribbons or sprigs of mint can elevate the look, making them perfect for birthdays, holidays, or even casual get-togethers.
Time Breakdown for Classic Peanut Butter Blossoms
When you're ready to whip up a batch of these delicious classic peanut butter blossoms, knowing the time needed can help you plan better. Here’s a quick breakdown:
Preparation Time
Set aside about 1 hour and 30 minutes for preparation, including chilling the dough. This step is crucial for achieving the perfect texture in your cookies.
Baking Time
Bake your cookies for approximately 12 minutes. Keep an eye on them as they near the end to ensure they come out just right—golden on the edges and soft in the center.
Total Time
In total, you’ll need around 1 hour and 45 minutes from start to finish. It may feel like a bit of a commitment, but trust us, the rich flavor and soft texture of these cookies are worth it!
If you’d like more tips on timing and techniques, check out this baking guide for additional insights that will elevate your cookie-baking game!
Nutritional Facts for Classic Peanut Butter Blossoms
Calories per cookie
Each of these delightful classic peanut butter blossoms comes in at about 110 calories. It's a sweet treat that won't completely derail your day!
Sugar content
With about 6 grams of sugar per cookie, these treats hit that perfect balance of indulgence without being overly sweet. When you think about it, sharing a batch is the best way to spread the happiness!
Protein and fat breakdown
These cookies boast around 3 grams of protein and 5 grams of fat each. The peanut butter provides healthy fats and a protein boost, making them a somewhat guilt-free pleasure. For a deeper dive into the nutritional benefits of peanuts, check out this Healthline article.
FAQs about Classic Peanut Butter Blossoms
Can I freeze the cookie dough?
Absolutely! You can freeze the classic peanut butter blossoms cookie dough for up to three months. Just scoop and roll the dough into balls, place them on a baking sheet to freeze, and then transfer them to a zip-top bag. When you're ready to bake, you can pop the frozen dough straight into the oven—just add an extra minute or two to the baking time.
What is the best way to store the baked cookies?
To keep your classic peanut butter blossoms fresh, store them in an airtight container at room temperature. They’ll stay delicious for up to a week. If you want to keep them longer, consider freezing the baked cookies; they can last up to three months in the freezer as well.
Can I use less sugar for a healthier version?
While it’s tempting to cut back on sugar for a healthier take, reducing it too much may affect the texture and flavor of your cookies. If you want a slightly healthier version, consider using a natural sweetener like honey or maple syrup, but be aware that you'll need to adjust the wet ingredients accordingly. For more tips on healthier baking, check out Sally's Baking Addiction.
Conclusion on Classic Peanut Butter Blossoms
In summary, classic peanut butter blossoms are a timeless treat that brings warmth and joy to any occasion. They are incredibly easy to whip up, making them perfect for both baking novices and seasoned pros. Don’t forget to enjoy them fresh, share with friends, and create sweet memories! For more delightful recipes, check out Sally's Baking Addiction for inspiration.

Classic Peanut Butter Blossoms
Equipment
- Hand mixer
- Stand mixer
- Bowls
- Baking sheets
- parchment paper
Ingredients
Cookie Ingredients
- 1.25 cups all-purpose flour spooned & leveled
- 0.5 teaspoon baking soda
- 0.25 teaspoon salt
- 0.5 cups unsalted butter softened to room temperature
- 0.5 cups packed light or dark brown sugar
- 0.25 cups granulated sugar
- 1 large egg at room temperature
- 0.75 cups creamy peanut butter
- 1 teaspoon pure vanilla extract
- 24 pieces chocolate kiss candies unwrapped
Coating
- 0.5 cups granulated sugar
- 0.25 cups green sanding sugar optional
- 0.25 cups red sanding sugar optional
Instructions
Preparation Steps
- Whisk the flour, baking soda, and salt together in a medium bowl. Set aside.
- In a large bowl, beat the butter until creamy. Add brown sugar and granulated sugar until smooth. Add the egg and mix well, then add peanut butter and vanilla and beat until combined.
- Add the flour mixture to the wet ingredients and mix on low until combined. Cover and chill the dough in the refrigerator for at least 1 hour.
- Preheat oven to 350°F (177°C) and line baking sheets with parchment paper. Prepare space in the freezer.
- Scoop and roll cookie dough into balls, roll in sugar, and place on baking sheets. Bake for 11–13 minutes until the tops crack.
- Press a chocolate kiss into each cookie and transfer to plates. Freeze for 10 minutes to set chocolate.
- Remove from the freezer and serve. Cookies stay fresh at room temperature for up to 1 week.
Leave a Reply